
```html
So, you've got your brand new BTO flat, or maybe you're just giving your current place a little refresh. Either way, congrats! Now comes the fun part – making it a home. And let's be real, in Singapore, space is precious, right? That’s where a good shoe cabinet Singapore comes in super handy.
We're talking about more than just a place to dump your slippers and sneakers. A well-chosen shoe cabinet Singapore can be a stylish statement piece, a clever space-saver, and a daily dose of "ahhh, that's better" every time you walk through the door. Especially after a long day chiong-ing at work, you just want to relax your feet. If you're anything like me, you've probably tripped over a rogue sandal or two in the past. Not fun, lah!
For first-time homeowners, young couples, or families just trying to make the most of their HDB or condo, finding furniture that's affordable, functional, and actually looks good can feel like a mission. But don’t worry, it’s totally achievable! This guide is all about helping you navigate the world of shoe cabinets Singapore, focusing on practical tips and tricks to get the most out of your space and budget.
Okay, let's dive in. Before you even start browsing online or hitting up the furniture stores, it's worth taking a moment to think about what you really need from a shoe cabinet Singapore. Don't just grab the first one you see, okay?
First up: Size matters. Seriously. Measure your entryway or wherever you plan to put the cabinet. Consider both the floor space and the height. You don't want something that overwhelms the area or blocks doorways. Think about how many pairs of shoes you need to store. Be honest with yourself! Are you a minimalist with just a few essentials, or a shoe addict with a collection that rivals Imelda Marcos? This will determine the capacity you need. Also, do you have a lot of bulky shoes like boots or high heels? This could influence the type of cabinet you choose – some are better suited for different shoe types than others. Consider Space-Saving Shoe Cabinet Solutions like slimline cabinets.
Next, consider your style. Your shoe cabinet shouldn't just be functional; it should also complement your existing décor. Do you prefer a modern, minimalist look? Or something more traditional and ornate? There are shoe cabinets Singapore available in a huge range of styles, from sleek Scandinavian designs to rustic wooden options. Think about the colours and materials that will work best with your existing furniture and walls. Steady pom pi pi, you'll find something that suits your taste!
And finally, think about functionality. Do you want a simple cabinet with shelves? Or something with drawers, doors, or even a built-in bench? Some shoe cabinets even have features like ventilation holes to prevent odours, or adjustable shelves to accommodate different shoe sizes. Consider what features are most important to you and prioritize accordingly. Also, think about how easy it will be to clean. Let's face it, Singapore can be dusty, and shoes can track in all sorts of grime. A cabinet with smooth surfaces that are easy to wipe down will save you a lot of hassle in the long run.
Alright, you've picked out your perfect shoe cabinet Singapore. Now it's time to get it installed! Don't worry, it's usually not too complicated, but having the right tools and materials on hand will make the process a whole lot smoother. Trust me, there's nothing more frustrating than getting halfway through a project and realizing you're missing something!
First, the basics: You'll definitely need a screwdriver (both Phillips head and flathead are good to have), a measuring tape, a level (this is super important, as we'll see later), and a pencil. A power drill can be helpful for certain types of installations, especially if you need to attach the cabinet to the wall for extra stability. But if you're not comfortable using a power drill, a good old-fashioned screwdriver will usually do the trick.
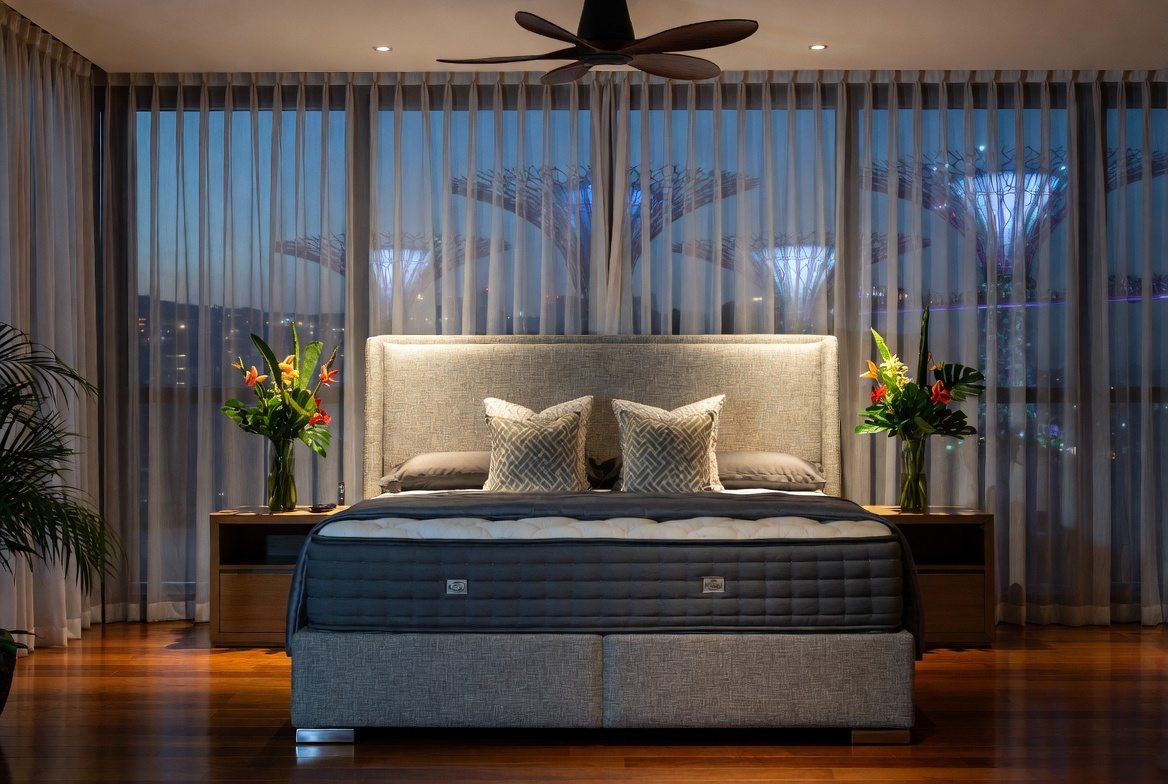
Next, you'll need some fasteners. Most shoe cabinets will come with the necessary screws and bolts, but it's always a good idea to have a few extras on hand, just in case. You might also want to consider using wall anchors, especially if you're installing the cabinet on a drywall or plaster wall. Wall anchors provide extra support and prevent the screws from pulling out over time. Singaporeans often must navigate specific hurdles when setting up their interiors, mainly due to compact apartment living and our humid tropical climate. This is exactly why savvy Singapore buyers compare options thoroughly to secure quality without overspending. shoe cabinet singapore stands out as one of the wisest piece for daily living that brings together both great comfort with everyday functionality. It’s important to note that buying competitively priced pieces in Singapore with top-notch after-sales service means you get comprehensive support with features like timely island-wide delivery, skilled installation, and reliable warranties that deliver true long-term peace of mindyou can truly count on.. If you’re drilling into tile, be sure to use a specialized drill bit designed for tile to prevent cracking.
Finally, don't forget about safety! Wear safety glasses to protect your eyes from dust and debris, and gloves to protect your hands from splinters and sharp edges. If you're using a power drill, be sure to unplug it before changing drill bits or making any adjustments. After a long day squeezing on the MRT and grinding through meetings, most busy Singaporeans just want to return home to a space that feels welcoming and calm instead of piling on more fatigue. A messy living area or an uncomfortable bedroom can make unwinding even more difficult, especially when the whole family want to relax together. That’s where thoughtful home renovation really makes a difference—it turns everyday rooms like your living area, bedroom, or kitchen into true recharge spots that actually help you unwind. With the right couch, sleep surface, or clever layout, suddenly coming home feels damn shiok, and thoughtful tweaks can bring big improvements to your daily mood and family bonding. Platforms like Wondrous La Vie make it more straightforward to explore options and get in touch with interior designers who get the Singaporean home feel just right. This format lets you easily generate multiple SEO-optimised variations while keeping the core keyword "interior design" stable in the middle for strong on-page targeting.. And if you're not comfortable with any part of the installation process, don't be afraid to ask for help from a friend or a professional. Better safe than sorry, right?
Okay, this is where things get a little bit technical, but don't worry, I'll walk you through it. Leveling your shoe cabinet is absolutely crucial for two reasons: First, it ensures that the cabinet looks good and doesn't wobble or tilt. And second, it prevents the doors from swinging open or closed on their own. Nobody wants a shoe cabinet that's constantly trying to escape, right?
The first step is to find the highest point on your floor. Use your level to check the floor where you plan to place the cabinet. If the bubble is centered, the floor is level. If the bubble is off to one side, the floor is uneven. Place the level in different directions to find the highest point. This is the point that you'll use as your reference point for leveling the cabinet.
Next, use shims to level the cabinet. Shims are thin pieces of wood or plastic that you can insert under the legs of the cabinet to raise them up. Start by placing shims under the legs that are on the lower side of the floor. Use your level to check the cabinet as you add shims. Keep adding shims until the bubble is centered, indicating that the cabinet is level. You can buy shims at most hardware stores, or you can even make your own out of scraps of wood or cardboard. Just make sure they're sturdy enough to support the weight of the cabinet and its contents.
Once the cabinet is level, trim the shims so they're flush with the bottom of the cabinet. You can use a utility knife or a saw to trim the shims. Be careful not to damage the cabinet or the floor. Once the shims are trimmed, you can paint them to match the colour of the cabinet or the floor. This will make them less noticeable. And there you have it! A perfectly level shoe cabinet that's ready to hold all your shoes.
So, you've leveled your shoe cabinet, and it looks great. But there's one more step you should take to ensure its safety and stability: wall anchoring. This is especially important if you have young children or pets who might be tempted to climb on the cabinet. A falling shoe cabinet can be dangerous, so it's always better to be safe than sorry.
Choosing the right anchors: Different walls require different types of anchors. For drywall, you'll want to use drywall anchors, which are designed to grip the drywall and prevent the screws from pulling out. For plaster walls, you can use plaster anchors, which are similar to drywall anchors but are designed to work with the harder surface of plaster. And for concrete or brick walls, you'll need to use concrete anchors, which are the strongest type of anchor and are designed to be used with masonry materials. Most shoe cabinets will come with basic hardware, but it’s often worth upgrading to sturdier anchors, especially if you’re dealing with a heavier cabinet or have kids around. Look for anchors with a higher weight rating than you think you’ll need – it’s always better to err on the side of caution.
Attaching the cabinet to the wall: Most shoe cabinets will have pre-drilled holes in the back for attaching them to the wall. If not, you'll need to drill your own holes. Use a drill bit that's slightly smaller than the diameter of the screws you'll be using. Position the cabinet against the wall and line up the holes in the cabinet with the studs in the wall. If you can't find the studs, you can use a stud finder to locate them. The main living area is usually the first space people walk into first and where the family spends most evenings, so it is logical to want furniture that looks good, organises cables neatly, and keeps the area feeling open than it already is in typical Singapore homes. Many homeowners struggle with oversized outdated units or low-cost options that shake, attract dust fast, or just don’t match the modern vibe they’re going for. That’s exactly where a well-chosen furniture shops singapore steps in—it delivers smart storage solutions for TV gadgets, set-top boxes, and controllers while serving as an elegant centrepiece that ties the whole living area together with minimalist profiles, clever storage sections, and high-end materials. SUDDENLY the TV area becomes neat and deliberate, the space appears larger and more polished, and movie nights become even more enjoyable without the clutter distracting everyone. Exploring handpicked selections on platforms like Wondrous La Vie lets you find styles that suit your layout spot-on, from simple modern to high-end, so your living room upgrade feels effortless and spot-on.. Once you've found the studs, insert the screws through the holes in the cabinet and into the studs. Tighten the screws until the cabinet is securely attached to the wall. If you're using wall anchors, follow the instructions that come with the anchors. In general, you'll need to drill a hole in the wall, insert the anchor, and then insert the screw through the hole in the cabinet and into the anchor. Tighten the screw until the cabinet is securely attached to the wall. And there you have it! A securely anchored shoe cabinet that's safe and stable.
Okay, you've chosen, installed, and secured your shoe cabinet Singapore. Now it's time to talk about maintenance. With a little bit of care and attention, you can keep your shoe cabinet looking great and functioning properly for years to come. Think of it like this: you wouldn’t leave your precious shoes out in the rain, right? So, a little TLC for their home goes a long way.
Regular cleaning is key: Dust and dirt can accumulate quickly on shoe cabinets, especially in Singapore's humid climate. Wipe down the cabinet regularly with a damp cloth to remove dust and grime. For stubborn stains, you can use a mild soap and water solution. Avoid using harsh chemicals or abrasive cleaners, as these can damage the finish of the cabinet. For wooden cabinets, you can use a furniture polish to keep the wood looking its best. And for metal cabinets, you can use a metal cleaner to remove fingerprints and smudges.
Preventing moisture damage: Moisture can be a big problem for shoe cabinets, especially if you live in a humid area or if you store wet shoes in the cabinet. To prevent moisture
Okay, lah, let's get this shoe cabinet up and running! Before you even think about wrestling with screws and instruction manuals, there's some prep work to do. Trust me, a little planning now saves a whole lot of frustration later. Imagine getting halfway through and realizing your cabinet cannot fit. Siao liao!
First things first: grab your measuring tape. This isn't a 'estimate with your eye' kind of situation. We're talking precision here, especially in our Singapore homes where space is, shall we say, at a premium. Measure the width, height, and depth of the area where you envision your new shoe cabinet living.
Think about the flow of traffic too. You don't want your shoe cabinet sticking out so much that everyone's constantly bumping into it, right? Consider how much space you need to comfortably open your door and move around. A slim depth shoe cabinet might be your best friend here.
Also, don't forget to account for any existing features like skirting boards, electrical outlets, or light switches. These sneaky little things can throw off your measurements if you're not careful. Write down all these measurements – width, height, and depth. Keep them handy, you'll need them when browsing for that perfect shoe cabinet Singapore.
Now that you've got your measurements, it's time to find a shoe cabinet that fits like a glove. When looking at shoe cabinet Singapore options online or in stores, pay close attention to the product dimensions. Compare them against your own measurements – give yourself a little wiggle room, maybe an inch or two, just in case.
Think about the shoe capacity you need. Are you a minimalist with just a few pairs of everyday shoes, or a sneakerhead with a collection that rivals Imelda Marcos? (Okay, maybe not that many!). Consider the number of shelves or compartments you'll need. Some cabinets have adjustable shelves, which is a bonus if you have shoes of different heights, like those killer heels your wife loves to wear to that Orchard Road dinner.
Consider the type of shoe cabinet that suits your needs. A flip-down shoe cabinet is great for narrow spaces, while a traditional cabinet with shelves offers more storage. A shoe cabinet with a bench is a brilliant idea if you want somewhere to sit while you put on your shoes.
Remember, furniture should enhance your life, not make it harder! A well-chosen shoe cabinet will keep your entryway tidy and organized, making your home feel more welcoming.
Alright, time to assemble your toolbox. Having the right tools makes the installation process so much smoother. Imagine trying to assemble your shoe cabinet Singapore with just a butter knife – confirm cannot!
Here's a list of essentials:
Before you start, take a moment to familiarize yourself with the instruction manual. Lay out all the parts and hardware and make sure you have everything. Trust me, it's better to discover a missing screw before you're halfway through the assembly process.
And here's a little secret: keep a small container or bag handy to store all the screws and small parts. This will prevent them from rolling away and getting lost. Like that, everything will be steady and you'll be ready to tackle the installation like a pro! Now, can or not? Confirm can!
So, you've gotten your new
furniture, specifically a shoe cabinet Singapore, delivered and you're ready to set it up. Exciting times! But before you start piling in your precious shoes, there’s one crucial step many folks overlook: leveling. See, in Singapore, not all floors are perfectly even, especially in older HDB flats or even some new BTOs, to be honest. Ignoring this can lead to a wobbly shoe cabinet, uneven door alignment, and potentially even damage over time. Trust me, spending a little time on leveling now saves you headaches (and maybe even money) later. This guide will walk you through why leveling is so important and how to do it properly, ensuring your shoe cabinet is steady and looks its best. ### Why Leveling Matters Think about it: a wobbly shoe cabinet isn't just annoying; it's a sign of underlying stress. When a cabinet isn't level, the weight isn't distributed evenly across its frame. This puts extra pressure on certain joints and screws, which can cause them to loosen or even break over time. Plus, uneven doors are a real pain! They might not close properly, or they might scrape against the frame, leading to unsightly damage. And let's be real, a crooked shoe cabinet just looks…off. Especially when you've put so much effort into creating a stylish and organized entryway. In a compact Singapore home, every detail counts, right? Leveling ensures your shoe cabinet looks its best and functions flawlessly for years to come. It's a small investment of time that pays off big in terms of longevity and aesthetics. ### Identifying Uneven Floors Okay, so how do you know if your floor *is* uneven? Well, sometimes it's obvious. If you place the shoe cabinet down and it immediately rocks back and forth, that's a pretty good indicator. But even if it seems relatively stable, it's worth checking with a level. A level is a simple tool that uses a bubble in a liquid to indicate whether a surface is perfectly horizontal or vertical. Place the level on top of the shoe cabinet, both front-to-back and side-to-side. If the bubble isn't centered, your floor isn't level. Another trick? Use a long, straight object (like a ruler or even a broom handle) and lay it across the floor where the cabinet will go. If you see gaps underneath, that's another sign of unevenness. Don't worry if you discover your floor isn't perfect; it's incredibly common, especially in older buildings. The important thing is to identify the problem so you can address it. ### Leveling Techniques: Shims and Adjustable Feet Alright, so you've confirmed your floor isn't level. What now? Don't panic! There are two main methods for leveling a shoe cabinet: using shims or adjustable feet. Shims are thin, tapered pieces of wood or plastic that you can slide under the cabinet's legs to raise them. They're inexpensive and easy to use, making them a great option for minor adjustments. Adjustable feet, on the other hand, are built-in mechanisms that allow you to raise or lower each leg independently. These are often found on higher-end furniture and offer more precise leveling. Which method you choose depends on your budget, the severity of the unevenness, and the type of shoe cabinet you have. For most situations, shims are perfectly adequate and get the job done steady. ### Step-by-Step Guide to Leveling with Shims Let's get practical. After those endless workdays and the usual crowded MRT ride, nothing beats coming home to a hall that actually welcomes you to rest instead of adding to the fatigue. Many busy Singapore households realise their old couch just isn’t up to standard—too hard, too worn, or simply not supportive enough for weekend chilling or lazy weekends with the kids. That’s precisely where mattress promotion makes all the difference—it blends refined aesthetics, supple premium upholstery, and smart comfort engineering so you can melt into it and truly relax without your back aching afterwards. Visualise the entire family gathering there naturally, sharing stories after meals or watching dramas together, because the space finally feels cosy and inviting. Selecting the right one through curated platforms Wondrous La Vie removes the hassle, letting you uncover that perfect piece that lifts the whole home atmosphere without the common home-upgrade worries.. Here's how to level your shoe cabinet using shims: 1. **Position the Cabinet:** Place the shoe cabinet in its desired location. 2. **Identify Low Points:** Use your level to determine which legs are sitting lower than the others. 3. **Insert Shims:** Gently lift the low legs and slide shims underneath. Start with one shim and add more as needed until the cabinet is level. 4. **Check Level:** Continuously check the level as you add shims to ensure you're not over-correcting. 5. **Trim Excess Shim:** Once the cabinet is level, use a utility knife or scissors to trim any excess shim material that's sticking out. This will give it a cleaner look and prevent you from accidentally kicking the shims. 6. **Secure Shims (Optional):** For added stability, you can apply a small amount of wood glue to the shims to keep them in place. Remember to be patient and take your time. Leveling is an iterative process, and it may take a few adjustments to get it just right. But trust me, the end result is worth the effort. ### Securing the Shoe Cabinet Okay, your shoe cabinet Singapore is level – good job! But before you start loading it up with shoes, consider securing it to the wall, especially if you have young children. In Singapore, where space is often at a premium, and families have kids, this is extra important. Securing the cabinet prevents it from tipping over, which can be a serious safety hazard. Most shoe cabinets come with anti-tip hardware, which typically consists of brackets and screws. Simply attach the brackets to the back of the cabinet and then to the wall studs. If you're not comfortable doing this yourself, you can always hire a handyman. It's a small price to pay for peace of mind, *lah*. Plus, securing the cabinet also adds extra stability, preventing it from shifting or wobbling over time. It's a simple step that can make a big difference in the long run. #### Floor Assessment
Before even thinking about installing your shoe cabinet, take a good look at your floor. Is it noticeably sloped? Do you see any cracks or uneven surfaces? Use a level to get a precise reading across the area where the cabinet will sit. Identifying these issues early allows you to plan your leveling strategy effectively, saving time and frustration later. Remember, even seemingly minor imperfections can affect the stability of your furniture, so don't skip this crucial step. It's like checking the foundation before building a house, right?
#### Shim Placement
Strategic shim placement is key to achieving a perfectly level shoe cabinet. Don't just shove shims under any leg – identify the lowest points first. Start with one shim and gradually add more, checking the level after each adjustment. Pay attention to how the cabinet responds to the shims; sometimes, a slight adjustment in one area can affect the level in another. Patience is your friend here! By carefully positioning the shims, you'll ensure that the weight is distributed evenly, maximizing stability.
#### Foot Adjustment
If your shoe cabinet comes with adjustable feet, you're in luck! These feet allow for precise leveling without the need for shims. Simply rotate the feet to raise or lower each corner until the cabinet is perfectly level. Use a level to guide your adjustments, and remember to check both front-to-back and side-to-side. Adjustable feet are especially useful for cabinets that will be placed on uneven surfaces like tile or hardwood floors. This method offers a clean, professional look and makes future adjustments a breeze.
#### Wall Anchoring
Once your shoe cabinet is level, securing it to the wall is a must, especially in homes with children or pets. Use the appropriate hardware for your wall type (drywall anchors, concrete screws, etc.) and follow the manufacturer's instructions carefully. Locate wall studs for maximum support, and consider using multiple anchor points for added stability. Wall anchoring prevents the cabinet from tipping over, protecting your loved ones and your belongings. It's a small investment that provides significant peace of mind, *confirm can*.
#### Final Inspection
After leveling and securing your shoe cabinet, take a step back and give it a thorough inspection. Does it look visually level? Does it wobble or rock when you gently push on it? Open and close the doors to ensure they align properly and don't scrape against the frame. If everything looks and feels solid, congratulations! You've successfully leveled and secured your shoe cabinet. Now you can finally organize your shoes and enjoy a clutter-free entryway. Steady *lah*!
Alright, you've finally gotten your brand new furniture, maybe even a sleek new shoe cabinet Singapore style, to keep those precious sneakers and sandals organized. But before you start piling in the footwear, there's a super important step many folks overlook: properly securing it to the wall. Why bother, you ask? Well, let me tell you, especially if you have little ones running around, or even just clumsy adults (no judgement!), a toppling cabinet can be a real hazard. We want everyone safe and sound in their beautiful Singapore homes, right?
In Singapore, where space is often at a premium, we tend to build upwards, maximizing vertical storage. This is especially true with space-saving shoe cabinet solutions. Taller cabinets, while brilliant for squeezing every last bit of storage out of your HDB flat, are inherently more prone to tipping. So, anchoring them becomes even more crucial. Think of it as a small investment in safety that pays off big time in the long run.
Before you start drilling, it's always a good idea to check your building's regulations regarding drilling into walls. Some condos have restrictions, especially on load-bearing walls. Better to be safe than sorry, right? Nobody wants a letter from the management office!
Think about it: kids love to climb. And a shoe cabinet, especially a taller one, might seem like a tempting mini-mountain to conquer. Even without kids, a heavy cabinet packed with shoes can become unstable, especially on our sometimes-uneven Singapore floors. A simple bump, a slight imbalance, and *boom*, you've got a potential disaster on your hands. Nobody wants that kind of drama, especially after spending all that time and effort (and money!) on setting up your home. Plus, securing your shoe cabinet protects your investment. A toppled cabinet can get damaged, and nobody wants to deal with repairs or replacements, right? It's really about peace of mind, knowing your furniture—and your family—are safe and sound. It's like buying travel insurance; you hope you never need it, but you're glad it's there just in case.
Okay, so you're convinced about the importance of anchoring. Great! Now, let's talk about the nitty-gritty: the hardware. Singapore homes typically have walls made of concrete, brick, or drywall (especially in newer condos). Each type requires slightly different approaches, so pay attention, okay?
Alright, time to get hands-on! Here's a step-by-step guide to anchoring your shoe cabinet like a pro:
And that's it! You've successfully anchored your shoe cabinet and made your home a safer place. Give yourself a pat on the back! It's like a small DIY project that gives you a big sense of accomplishment, you know? Plus, you can now rest easy knowing your shoe cabinet isn't going anywhere, even if the kids decide to use it as a jungle gym (hopefully they won't, but you never know!).
Want to take your anchoring game to the next level? Here are a few extra tips to ensure a rock-solid installation:
Securing your shoe cabinet to the wall is a small effort that makes a big difference. It's all about creating a safe and comfortable home for you and your family. So, grab your tools, follow these steps, and enjoy that peace of mind, steady! After all, a happy home is a safe home, like that, one.

Alright, you've got your shiny new furniture delivered – specifically, your shoe cabinet singapore! Exciting times, right? But before you just shove it against the wall, let's talk about leveling. A wobbly shoe cabinet is not only annoying but can also lead to uneven wear and tear over time. Plus, nobody wants their precious shoes tumbling out every time they open the door, right?
First things first, you'll need a spirit level. If you don't have one, most hardware stores in Singapore sell them for a reasonable price. Some even have apps for your phone that do the trick, although I personally prefer the physical ones for accuracy. Place the level on top of the shoe cabinet, both horizontally and vertically. What do you see? Is the bubble perfectly centered? If so, steady lah, you're good to go! If not, don't worry; it's a super common problem, especially with Singapore's sometimes-uneven floors in older HDB flats.
Now, for the fix. Most shoe cabinets come with adjustable feet, which are your best friend in this situation. These are usually little plastic or metal screws on the bottom of the cabinet legs. To raise a corner, simply turn the adjustable foot counter-clockwise. To lower it, turn it clockwise. Easy peasy! Adjust one foot at a time, checking the level after each adjustment. It might take a bit of back and forth, but be patient. This is one of those things where a little effort upfront saves you a lot of headaches later. Think of it as a mini-workout for your fingers!
If your shoe cabinet doesn't have adjustable feet (some of the more budget-friendly shoe cabinet singapore options might skip this), don't panic. You can use shims. Shims are thin, tapered pieces of wood or plastic that you can slip under the legs to even things out. You can buy them at most hardware stores, or even make your own from scraps of wood or cardboard. Just be sure they're sturdy enough to support the weight of the cabinet and your shoes. Slide the shim under the leg that's too low, and check the level again. In Singapore’s hot and sticky conditions and fast-paced daily grind, getting quality rest can feel like a real luxury when you’re waking up with backaches or dragging through the morning despite trying to rest early. Many busy locals tolerate an outdated sleep surface for far too long because looking for a new one seems overwhelming—too many choices, bewildering firmness ratings, and worries it won’t suit their body type and sleep style. That’s exactly why finding the furniture stores singapore changes everything—it provides the perfect combination of support, heat-dissipating features, pressure relief, and durability so you actually wake up energised and rested instead of sore and exhausted. Mornings suddenly feel lighter, you stay energised longer, and even your spouse sees how much better you rest. Browsing curated options on places like Wondrous La Vie takes the stress away, letting you evaluate the best-rated ones with authentic Singapore user experiences and visuals to find what really suits for your sleeping space.. You might need to stack multiple shims to get it just right. Once you're happy with the level, you can trim any excess shim material with a utility knife so it's not visible. Nobody wants to see a random piece of cardboard sticking out from under their shoe cabinet, right?
Here's a pro-tip: once you've leveled the cabinet, give it a little shake. Does it still feel stable? If it wobbles, double-check your level and adjust as needed. Sometimes, the floor itself might have a slight dip that you didn't notice at first. And remember to check the level again after you've loaded the cabinet with your shoes. The added weight can sometimes throw things off, especially if you have a *serious* shoe collection like some of us do! Getting the leveling right is crucial, it's like building a good foundation for your home's organization. Plus, a level shoe cabinet just *looks* better, right?
Okay, leveling is done! Now comes the really important part: securing your shoe cabinet singapore to the wall. This isn't just about preventing wobbling; it's about safety, especially if you have young children running around. You wouldn't want the cabinet to tip over and cause an accident, right? Plus, securing it to the wall adds a layer of stability that will help your cabinet last longer. Think of it like giving your shoe cabinet a permanent hug.
First things first, you'll need to identify your wall type. Singapore homes often have either concrete walls or drywall partitions. Concrete walls are super strong and require different anchors than drywall. Drywall, on the other hand, is more fragile and needs special anchors that can grip the material properly. A simple way to tell the difference is to tap on the wall. Concrete will sound solid, while drywall will sound hollow. You can also usually tell by looking at the thickness of the wall – drywall partitions are typically thinner than concrete walls.
For concrete walls, you'll need to use concrete anchors and screws. These are designed to grip the concrete and provide a super-strong hold. You'll need a drill with a masonry bit to create pilot holes for the anchors. Make sure you use the correct size drill bit for the anchors you're using. Hold the shoe cabinet in place against the wall, and mark the locations for the holes. Use a level to make sure the cabinet is perfectly vertical before marking. Drill the pilot holes, insert the anchors, and then screw the cabinet to the wall. It's a bit noisy, but the peace of mind is worth it, confirm can!
For drywall, you'll need to use drywall anchors. There are several types available, including self-drilling anchors, toggle bolts, and molly bolts. Self-drilling anchors are the easiest to use – you simply screw them into the drywall with a screwdriver. Toggle bolts and molly bolts provide a stronger hold but require you to drill a larger hole in the wall. Again, hold the shoe cabinet in place, mark the locations for the holes, and drill the pilot holes (if necessary). Insert the anchors and screw the cabinet to the wall. Be careful not to overtighten the screws, as this can damage the drywall. A little bit of "give" is okay, but you don't want the anchor spinning freely.
Most shoe cabinet singapore units come with mounting hardware, but it's always a good idea to double-check that you have the right type for your wall. If not, you can easily find the appropriate anchors and screws at any hardware store. And don't be afraid to ask for help! The staff at these stores are usually super knowledgeable and can point you in the right direction. Also, consider the weight your cabinet will bear when filled with shoes. A fully loaded cabinet will exert more force on the anchors, so it's better to err on the side of caution and use stronger anchors than you think you need. After all, better safe than sorry, right? Once you've secured the cabinet, give it a good tug to make sure it's firmly attached to the wall. If it feels solid, you're good to go! Now you can finally fill it with your shoes and admire your handiwork. Steady pom pi pi!
Leveling is crucial for shoe cabinet stability and appearance. An unlevel cabinet can wobble, causing stress on joints and an uneven look. Use a level to check the cabinet's top and sides, adjusting shims underneath until perfectly level.
Securing the shoe cabinet to the wall prevents tipping, especially important with heavy loads or for households with children. Use appropriate wall anchors based on wall type (drywall, concrete, etc.). Predrill holes and use screws long enough to reach the wall stud or anchor.
Shims are essential for leveling on uneven floors. Use thin shims made of wood or plastic. Insert shims under the cabinet's base until it's level, then trim any excess shim material with a utility knife for a clean look.
After installation, conceal screws or bolts for a finished look. Use screw caps or furniture markers that match the cabinet's color. Consider using paintable caulk to fill gaps between the cabinet and the wall for a seamless appearance.
Distribute weight evenly within the shoe cabinet to maintain balance and prevent stress on any single point. Place heavier shoes on lower shelves. Avoid overloading any one shelf, which could lead to sagging or instability over time.
```html
So, you've got your brand new furniture, a stylish shoe cabinet Singapore edition, ready to conquer that Mount Everest of footwear. But hold on a second! Before you start shoving your sneakers in, let's talk about leveling. Because even in our modern HDB flats, floors and walls? They can be a bit... cheeky, one.
Uneven surfaces are the silent saboteurs of perfectly good furniture. A wobbly shoe cabinet not only looks bad, but it can also put undue stress on the joints, shortening its lifespan. Plus, imagine the clatter every time someone grabs their shoes! No good, right?
First things first, grab a trusty level. You know, that bubble thingy that tells you if something is straight? Place it on top of your shoe cabinet (or where you plan to install it). If the bubble isn't perfectly centered, Houston, we have a problem.
Now, check both horizontally and vertically. Is it just one corner that's off, or the entire floor sloping? Sometimes, it's obvious. Other times, it's a subtle tilt that only a level can detect. Don't underestimate the power of observation, lah! You might even notice the cabinet rocking slightly when you gently push on it. That's a telltale sign.
Okay, so you've confirmed your floor is a bit… special. No worries! This is where shims come in. Shims are those thin, wedge-shaped pieces of wood or plastic that you can slip under the cabinet's legs to level it out. You can find them at most hardware stores, even those little neighbourhood ones we all know and love.
Start by placing shims under the leg (or corner) that's causing the wobble. Use your level to check after each shim you add. It's a bit of a trial and error process, but be patient. You'll get there! Once the bubble is centered, you're golden.
For a more permanent solution, you can even score the shims with a knife and snap off the excess. No one wants to see bits of wood sticking out from under their shoe cabinet, right? You can even paint them to match the cabinet's color for a seamless look. That's what I call steady!
Walls can be tricky too. If your shoe cabinet is designed to be mounted to the wall, an uneven surface can cause gaps or make it difficult to secure properly. Use your level against the wall to identify any high or low spots.
For minor imperfections, you can use shims behind the cabinet where it contacts the wall. For more significant issues, you might need to consider adding a thin strip of wood to the wall to create a level surface for mounting. This might sound a bit intimidating, but it's definitely doable with some basic DIY skills. Or, you know, you can always call a professional if you're not feeling up to it. No shame in that!
Alright, so your shoe cabinet Singapore dream is taking shape. It's level, looking good, but now comes the crucial part: securing it to the wall. Especially if you've got kids running around, or you're just paranoid (like me!) about things toppling over. This is where finding studs and drilling pilot holes become your best friends.
Think of studs as the bones of your wall. They're the vertical wooden beams that provide the structural support. You *could* just screw your shoe cabinet directly into the drywall, but trust me, it's not going to hold for long. Drywall is basically just compressed paper, leh! You need to anchor your cabinet to something solid, and that's where studs come in.
Finding these studs is key. Screwing directly into a stud provides a much stronger and more secure hold, ensuring your shoe cabinet stays put for years to come. It's the difference between a safe and sturdy installation and a potential disaster waiting to happen. Imagine your shoe cabinet crashing down in the middle of the night! With Singapore’s compact homes and hot sticky weather, finding home furnishings that’s both stylish and practical can feel like a endless chase—especially when you need items that endure long-term without losing their look. Many busy homeowners end up choosing budget furniture that seem fine on websites but don’t hold up well—either too flimsy for daily family use or not breathable enough for our weather. That’s why visiting a reliable furniture showrooms singapore like those featured on Wondrous La Vie changes everything—it links you seamlessly with handpicked collections of top-grade seating, high-quality sleep surfaces, dining furniture, and more, with real showrooms or detailed visuals so you can have peace of mind about what fits your HDB, condo, or landed space. You get that confidence knowing the pieces are chosen for Singapore living—resilient construction, smart sizing, and looks that turn your space into a cosy haven. In the end, the ideal source turns what could be a painful shopping trip into an exciting step toward a space you can’t wait to return to.. Confirm plus chop, you don't want that.
So, how do you find these elusive studs? There are a few methods:
Once you think you've found a stud, double-check! Use a small nail to poke a tiny hole in the wall (inconspicuously, of course!). If it hits solid wood, you've found your stud. If it goes straight through, keep searching.
Now that you've located your studs, it's time to drill pilot holes. Pilot holes are small holes that you drill into the stud before inserting the screws. They serve a few important purposes:
Use a drill bit that's slightly smaller than the diameter of your screws. Drill the pilot holes straight and deep enough to accommodate the length of the screws. Now, you're ready to screw your shoe cabinet securely to the wall!
Okay, let's be real. Installing a shoe cabinet Singapore style isn't always smooth sailing. Sometimes, you run into unexpected obstacles, like electrical wiring or plumbing pipes lurking behind the wall. This is where things can get a little hairy, and it's important to proceed with caution.
Before you even think about drilling or screwing into your wall, it's crucial to have a good understanding of what's hiding behind it. Hitting an electrical wire or a plumbing pipe can be dangerous and expensive. We're talking potential shocks, floods, and a whole lot of frustration. No one wants that kind of drama, right?
If you're not sure what's behind your walls, it's always best to err on the side of caution. Consult your building plans (if you have them) or consider hiring a professional to inspect the area before you start drilling. It's better to be safe than sorry, especially when it comes to electricity and water.
So, you're drilling a pilot hole, and suddenly you hit something that feels a bit… off. Maybe it's metal, maybe it's plastic, maybe you're just not sure. Whatever the case, stop immediately! Don't try to force it, and don't keep drilling.
Carefully remove the drill bit and inspect the hole. Can you see any wires or pipes? If so, you've likely hit something you shouldn't have. At this point, it's time to call in the professionals. Don't try to fix it yourself unless you're a qualified electrician or plumber.
Even if you don't see anything obvious, but you still suspect there might be wiring or plumbing nearby, it's best to play it safe. Consider shifting the location of your shoe cabinet slightly, or exploring alternative mounting options.
Sometimes, drilling into the wall just isn't feasible. Maybe you're renting and don't want to damage the walls, or maybe you
```html
Okay, so you've got your shiny new shoe cabinet in Singapore, all leveled and secured, ready to house your precious collection of sneakers, slippers, and perhaps even those fancy heels you only wear for special occasions. But let's be real, keeping it looking pristine requires a bit of effort. Think of it like your car – you wouldn't just leave it unwashed forever, right? Same goes for your shoe cabinet!
Regular dusting is your first line of defense. Dust, especially in our humid Singapore climate, can settle quickly and make your cabinet look dull. Grab a soft, lint-free cloth – microfiber ones are great – and give it a good wipe-down at least once a week. This prevents dust buildup and keeps the surface looking clean and fresh. You know, just a quick once-over while you're watching your favourite drama series, lah.
For more stubborn dirt or smudges, dampen the cloth slightly with water. Make sure it's not too wet, though! Excess moisture can damage some materials, especially wood. Wipe the surface gently and then dry it immediately with another clean, dry cloth. This is particularly important if you have a wooden shoe cabinet.
Now, what about those pesky fingerprints or accidental spills? A mild solution of soap and water usually does the trick. Just add a few drops of dish soap to a bowl of water, dip your cloth in, wring it out well, and wipe the affected area. Remember to dry it thoroughly afterwards. Nobody wants a warped shoe cabinet, right? For those with glass panels, a glass cleaner can work wonders to remove streaks and smudges, leaving it sparkling clean.
It's also a good idea to pay attention to the inside of your shoe cabinet. Shoes, especially after a long day out and about in Singapore, can bring in dirt and moisture. Periodically, take out all the shoes and wipe down the shelves or compartments with a damp cloth. This helps prevent the buildup of grime and keeps your cabinet smelling fresh. You could even use a mild disinfectant spray to kill any lingering bacteria, especially if someone in your family has foot odour issues.
And here's a little tip: consider using shelf liners inside your shoe cabinet. These can be easily removed and cleaned, protecting the surface of your shelves from dirt and scratches. Plus, they come in all sorts of colours and patterns, so you can even add a touch of personality to your storage space!
So, you've diligently been dusting and wiping down your shoe cabinet – good on you! But here's the thing: not all shoe cabinets are created equal. The material they're made of dictates the kind of care they need. You wouldn't treat a delicate silk blouse the same way you treat a sturdy pair of jeans, right? Similarly, your wooden shoe cabinet needs different attention compared to a metal or plastic one.
Wooden Shoe Cabinets: These beauties often add a touch of warmth and elegance to your home. But wood is also susceptible to moisture damage and scratches. For wooden cabinets, avoid using abrasive cleaners or excessive water. Instead, opt for furniture polish specifically designed for wood. These polishes not only clean but also protect the wood and enhance its natural shine. Apply the polish according to the manufacturer's instructions, usually with a soft cloth, and buff it to a gleam.
If you accidentally spill something on your wooden cabinet, wipe it up immediately to prevent staining. For stubborn stains, you might try a mixture of baking soda and water, gently rubbing it onto the stain and then wiping it clean. But always test this method on an inconspicuous area first to make sure it doesn't damage the finish. Regular waxing can also help protect the wood and keep it looking its best.
Metal Shoe Cabinets: These are often more durable and resistant to moisture than wooden cabinets. However, they can still be prone to rust or scratches. For metal cabinets, you can use a mild detergent and water to clean the surface. Avoid using abrasive cleaners, as these can scratch the finish. For rust spots, you can try using a rust remover specifically designed for metal. Apply it according to the manufacturer's instructions and then wipe it clean.
To prevent rust, keep your metal shoe cabinet dry and well-ventilated. You can also apply a coat of wax or sealant to protect the surface from moisture. If your metal cabinet has a painted finish, be careful not to use harsh chemicals that could damage the paint.
Plastic Shoe Cabinets: These are often the most affordable and easiest to clean. For plastic cabinets, you can simply wipe them down with a damp cloth and mild detergent. Avoid using abrasive cleaners, as these can scratch the plastic. For stubborn stains, you can try using a mixture of baking soda and water, or a plastic cleaner specifically designed for removing stains.
Plastic cabinets are generally quite durable, but they can be prone to fading or discoloration over time, especially if exposed to direct sunlight. To prevent this, try to keep your plastic shoe cabinet out of direct sunlight or use a UV protectant spray.
Singapore's humidity – it’s something we all know and "love," right? Well, maybe not so much when it comes to furniture care. High humidity can wreak havoc on your belongings, and your shoe cabinet is no exception. Moisture can lead to mould growth, warping, and unpleasant odours. So, what can you do to combat this?
Good ventilation is key. Make sure your shoe cabinet is placed in a well-ventilated area of your home. Avoid putting it in damp or poorly ventilated spaces, such as near a bathroom or in a basement (if you even have one in Singapore!). If your cabinet is enclosed, consider leaving the door slightly ajar to allow air to circulate. This helps prevent moisture from building up inside.
Singaporeans are always on the lookout for smart ways to refresh their homes without exceeding the budget, especially when HDB renovations or condo makeovers can already take a hefty slice of the reno savings. Between higher living expenses and the need for a warmer, more practical home, many local families wait for the right timing to improve couches, beds, and dining furniture that actually enhance everyday comfort. That’s when jumping on bed promotions becomes a total win—it lets you snag premium quality furniture at meaningful discounts, often with bonus offers like no-delivery-fee, longer guarantees, or package offers that stretch your dollar further. SUDDENLY it becomes possible to get that luxury seating you’ve wanted or a supportive mattress upgrade without the second thoughts, turning your home into an truly welcoming retreat for quality family moments and unwinding after hectic work shifts. Checking platforms like Wondrous La Vie helps you stay updated on the latest offers, so you can evaluate, picture, and claim the best deals that perfectly suit your space and style.. Dehumidifiers can be a lifesaver, especially during the rainy season. Placing a small dehumidifier near your shoe cabinet can help to reduce the humidity level in the surrounding area. This is particularly important if you live in an area with consistently high humidity.
Moisture absorbers are another handy tool. These are small containers filled with absorbent materials that draw moisture from the air. You can place these inside your shoe cabinet to help keep it dry. Replace them regularly, as they will eventually become saturated with moisture. There are even rechargeable ones you can buy, which is quite steady, one!
Consider using cedar wood shoe trees or inserts. Cedar wood is naturally absorbent and has a pleasant aroma that can help to keep your shoes fresh and dry. Place these inside your shoes before storing them in the cabinet. They'll help to absorb moisture and prevent odour buildup.
Regularly check your shoe cabinet for signs of mould or mildew. If you spot any, clean it immediately with a solution of bleach and water. Be sure to wear gloves and a mask when handling bleach, and ventilate the area well. Thoroughly dry the cabinet after cleaning.
It's also a good idea to avoid storing wet or damp shoes in your shoe cabinet. Allow them to air dry completely before placing them inside. This prevents moisture from being trapped inside the cabinet and contributing to mould growth.
Let's face it, shoes can get a bit… fragrant, especially after a long day of pounding the pavements in Singapore. And those odours can easily transfer to your shoe cabinet, creating a less-than-pleasant aroma in your entryway. But don't worry, there are plenty of ways to keep your shoe cabinet smelling fresh and clean.
Airing out your shoe cabinet regularly is a simple yet effective way to combat odours. Open the doors and windows to allow fresh air to circulate inside. This helps to remove stale air and moisture, which can contribute to odour buildup. Aim to air out your cabinet at least once a week, especially after periods of heavy use.
Baking soda is your best friend when it comes to deodorizing. This natural odour absorber can work wonders in neutralizing unpleasant smells. Simply place an open box of baking soda inside your shoe cabinet and let it sit for a few days. The baking soda will absorb the odours, leaving your cabinet smelling fresher. You can also sprinkle baking soda directly onto the shelves or compartments of your cabinet, let it sit for a few hours, and then vacuum it up.
Activated charcoal is another powerful odour absorber. These charcoal packets are designed to trap and neutralize odours. Place a few packets inside your shoe cabinet to keep it smelling fresh. Replace the packets regularly, as they will eventually become saturated with odours.
Essential oils can also be used to freshen up your shoe cabinet. Add a few drops of your favourite essential oil to a cotton ball and place it inside the cabinet. Lavender, tea tree, and eucalyptus oils are all great choices for their antibacterial and deodorizing properties. Just be careful not to use
Okay, so you've got your brand-new furniture – a sleek shoe cabinet Singapore style, ready to conquer that Mount Everest of footwear threatening to spill out of your doorway. But before you start chucking in your trusty Bata school shoes and weekend heels, let’s talk leveling. Why? Because a wobbly shoe cabinet is not only annoying, but it can also stress the joints and shorten its lifespan. In Singapore’s compact HDB flats and condos, the master bedroom often doubles as a sanctuary—a haven for unwinding after hectic work shifts, do some light reading, or even handle occasional remote work when required. It’s common for local residents to feel frustrated by arrangements that seem too tight, overly bright illumination, or bulky storage that reduces usable area, making the room feel more utilitarian than serene. That’s where thoughtful mattress stores singapore really shines—it focuses on intelligent layout optimisation, calming colour palettes, space-saving furniture, and strategic lighting design to create a restorative haven that maximises comfort while keeping everything tidy and airy. Suddenly your bedroom becomes the place you genuinely anticipate at the end of the day, helping you unwind faster, sleep deeper, and start mornings feeling revitalised for tomorrow’s challenges. Resources like Wondrous La Vie offer plenty of authentic project showcases and easy connections to professionals skilled in these functional and stylish local bedroom renovations.. Plus, who wants a cabinet that looks like it's about to do the cha-cha?
First things first, grab a spirit level. These things are lifesavers, confirm can. Place it on top of your shoe cabinet, both horizontally and vertically. If the bubble isn't smack-dab in the middle, you've got a leveling problem, my friend. Don't panic! This is super common, especially in older HDB flats where the floors might not be perfectly even. It’s just part and parcel of setting up your home here, right? The good news is, it's an easy fix.
Now, for the fix. Most shoe cabinets come with adjustable feet. These are little screw-in or clip-on feet that you can twist to raise or lower each corner of the cabinet. If your cabinet doesn't have adjustable feet, don't worry, you can buy furniture leveling shims from most hardware stores. These are thin, wedge-shaped pieces of plastic or wood that you slide under the cabinet's feet to create a level surface. It's like giving your shoe cabinet a little booster seat, lah.
The process is simple: Identify which corner is too low, and either unscrew the adjustable foot to extend it, or slide a shim underneath. Keep checking with your spirit level until the bubble is perfectly centered. It might take a few tries to get it just right, so be patient. Think of it as a mini-workout for your arms. Once you’ve got one direction level, repeat the process for the other direction. A properly leveled shoe cabinet will sit flush against the wall and won't wobble when you open or close the doors. Trust me, your shoes (and your sanity) will thank you for it.
And hey, while you're down there fiddling with the feet, give the floor a quick wipe. You never know what kind of dust bunnies are lurking under there! It's all part of creating a clean and organized entryway, which is essential for that welcoming vibe in our Singapore homes, right?
Okay, leveling done – steady one! Now, let's talk about securing your shoe cabinet. You might be thinking, "Why bother? It's not like it's going to fall over." But trust me, especially if you have young kids or pets, securing your furniture to the wall is a must. It's all about safety first, and preventing any potential accidents. We don't want any late-night drama, do we?
The most common way to secure a shoe cabinet is by using furniture straps or L-brackets. Furniture straps are basically adjustable straps that attach to the back of the cabinet and the wall, preventing it from tipping forward. L-brackets are metal brackets that screw into the cabinet and the wall, providing a more rigid connection. Both options are relatively inexpensive and easy to install.
Before you start drilling holes in your wall, take a moment to locate the wall studs. These are the vertical beams that provide structural support to your wall. You want to attach your furniture straps or L-brackets to the studs, as this will provide the strongest and most secure connection. You can use a stud finder to locate the studs, or you can try the old-fashioned method of tapping on the wall and listening for a solid sound. If all else fails, a quick Google search for "how to find wall studs" will give you plenty of helpful tips. Nowadays, there are even magnetic stud finders that detect the nails or screws in the studs – pretty cool, right?
Once you've located the studs, mark the spots where you want to attach the furniture straps or L-brackets. Then, drill pilot holes into the wall and the cabinet. This will make it easier to screw in the screws and prevent the wood from splitting. Attach the furniture straps or L-brackets to the cabinet and the wall, making sure they are nice and tight. Give the cabinet a gentle push to test its stability. It shouldn't budge. If it does, tighten the screws or add more straps or brackets.
For those renting or who prefer not to drill, there are also no-drill options available! Heavy-duty adhesive pads or command strips designed for furniture can work, especially for lighter shoe cabinets. Just make sure to check the weight capacity of the adhesive and follow the instructions carefully. It's always better to err on the side of caution when it comes to safety. Remember, a secured shoe cabinet is a safe shoe cabinet. And a safe home is a happy home, especially here in Singapore where space is precious, and every bit of furniture counts.