 Maxi Home")
So, you've decided to tackle a DIY shoe cabinet project – that's fantastic! Building your own furniture can be super satisfying, and let's be honest, in Singapore, where space is precious, a custom-built shoe cabinet Singapore style can be a real lifesaver. But before you start piling in your Havaianas and sneakers, it's crucial to make sure your creation is structurally sound. We're talking about safety, longevity, and avoiding a potential shoe avalanche in your lovely new BTO flat, leh!
Think about it: a wobbly, unstable shoe cabinet Singapore is more than just an eyesore. It can be a safety hazard, especially if you have kids running around. And nobody wants to see their hard work (and hard-earned money) literally fall apart after just a few months. We all know how quickly things can deteriorate in Singapore's humid climate, right? That's why ensuring your DIY project is solid from the get-go is so important.
For first-time homeowners, BTO owners, and young families setting up their homes, budget is always a consideration. We get it! But skimping on structural integrity to save a few dollars now could end up costing you way more in the long run. Local homeowners across the island often must navigate specific hurdles when outfitting their living spaces, particularly due to compact apartment living and relentless heat and humidity. This is precisely why discerning residents invest effort upfront to choose wisely to enjoy real long-term value. shoe cabinet singapore emerges as a smart purchase that delivers both outstanding comfort along with real durability. It pays to opting for budget-friendly items in Singapore with reliable after-sales service promises you full support including efficient island-wide delivery, professional installation, and reliable warranties that deliver true long-term peace of mindyou can truly count on.. Imagine having to rebuild the entire thing, or worse, dealing with damaged flooring or injured family members. Not worth it, right?
Plus, a well-built shoe cabinet Singapore isn't just about practicality; it's about peace of mind. Knowing that your furniture is sturdy and reliable allows you to focus on other things, like enjoying your new home and creating memories with your loved ones. It's an investment in your comfort and security, like that insurance policy you took out, one.
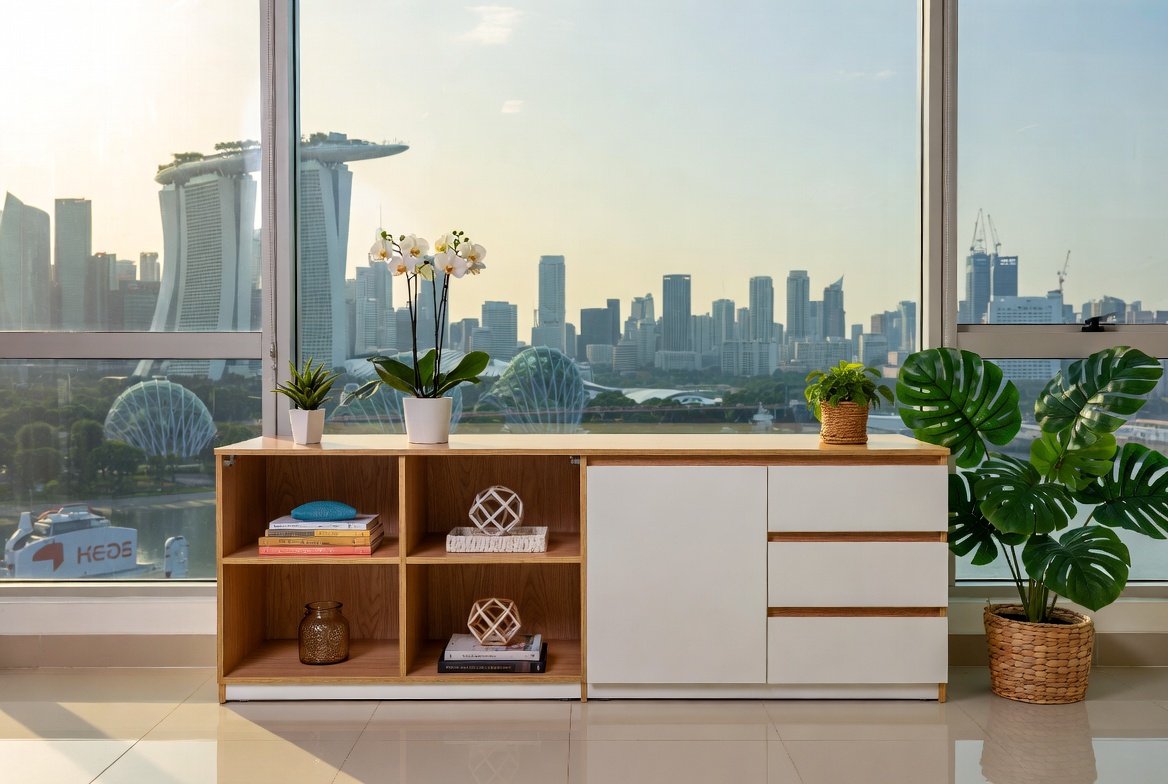
We've all seen those cheap, flimsy furniture pieces that seem to disintegrate the moment you look at them the wrong way. They might look nice in the showroom, but they're often made with low-quality materials and poor construction techniques. That’s why DIY, done right, can be a fantastic alternative! The main living area is often the primary spot guests see and where the whole household gathers at night, so it is logical to want pieces that looks good, keeps cords tidy, and keeps the area feeling open than it normally is in HDB or condo layouts. Many Singaporeans endure bulky old cabinets or budget cabinets that feel unstable, gather dust quickly, or just don’t fit the current aesthetic they’re trying to achieve. That’s exactly where a well-chosen furniture shops singapore steps in—it provides sleek storage for media devices, streaming players, and controllers while serving as an elegant centrepiece that brings the room together seamlessly with sharp modern edges, thoughtful compartments, and premium finishes. SUDDENLY the TV area becomes neat and deliberate, the area feels more spacious and cohesive, and Netflix sessions feel so much better without the clutter distracting everyone. Exploring handpicked selections on platforms like Wondrous La Vie lets you find designs that fit your space perfectly, from minimalist to luxurious, so your hall refresh turns smooth and just right.. You get to choose the materials, control the quality, and create something that's perfectly tailored to your needs and space. And that's what we are aiming for, steady and reliable shoe cabinet Singapore style.
So, let’s dive in and make sure your DIY shoe cabinet Singapore project is a success! We'll walk you through the key steps to verify its structural integrity and stability, ensuring it's not only functional and stylish but also safe and long-lasting. Because at the end of the day, a well-built shoe cabinet is a happy shoe cabinet, and a happy shoe cabinet means a happy home!
So, you've decided to tackle a DIY shoe cabinet project – good on you! Building your own furniture for your Singapore home is super satisfying, especially when space is, well, precious, right? But before you start piling in your Havaianas, sneakers, and office-appropriate shoes, let's make sure that cabinet's actually gonna, you know, *stay* standing. Nobody wants a shoe avalanche in the middle of the night, *lah*!
This isn't about being a master craftsman from the get-go. It's about being smart and checking the crucial bits. Think of it as your shoe cabinet's health check – a bit like going for your regular medical checkup, but for your furniture! This way, you can catch any potential problems early and ensure your hard work pays off with a sturdy and reliable piece for your HDB or condo.
First things first: the base. This is where all the weight rests, so it's gotta be solid. Place your shoe cabinet on the floor where it's intended to live. Now, grab a spirit level. You *do* have one, right? If not, a quick trip to the hardware store is in order. Place that level on top of the cabinet, both lengthwise and widthwise. Is the bubble centered? If not, you've got an uneven base. This can be a real pain, but don't worry, it's fixable.
Why is this important? Well, an uneven base puts stress on the entire structure. Over time, this can lead to warping, wobbly legs, and ultimately, a collapse. Imagine coming home after a long day, only to find your shoe cabinet has decided to take a nap on the floor, shoes scattered everywhere. Not a pretty sight!
What if your floor is uneven? That's a common issue, especially in older buildings. In that case, you'll need to shim the cabinet. Shims are thin pieces of wood or plastic that you can slip under the legs to level things out. You can buy them pre-made, or even cut them yourself from scrap wood. Just make sure they're securely in place. Some people even use folded cardboard in a pinch, but for a long-term solution, proper shims are the way to go.
While you're down there, check for any signs of damage to the base itself. Are there any cracks, splits, or signs of rot? If you're using reclaimed wood, this is especially important. Remember, prevention is better than cure. Addressing these issues early on will save you a lot of headaches (and potential shoe spills!) later.
Next up: the legs. These little guys are responsible for supporting the entire weight of your shoe cabinet Singapore, so they need to be strong and securely attached. Give each leg a good wiggle. Are they loose? Do they wobble? If so, you've got a problem. Loose legs can be caused by a number of things, like stripped screws, weak joints, or simply poor construction.
If the screws are stripped, try replacing them with longer, thicker ones. You might even need to use wood glue to reinforce the joints. For more serious issues, like broken or cracked legs, you might need to replace them entirely. This might sound daunting, but it's often easier than trying to repair a severely damaged leg. Just make sure you use legs that are the same height and style as the originals, *okay*?
Another thing to check is the angle of the legs. Are they all perfectly vertical? If one or more legs are leaning, it can throw off the balance of the entire cabinet. This is especially important for taller cabinets, as they're more prone to tipping over. You can use a level or a square to check the angle of the legs. If they're not quite right, you might need to adjust the way they're attached to the base.
Consider adding adjustable feet to your shoe cabinet. These are small, screw-in feet that allow you to fine-tune the height of each leg. This is especially useful if your floor is slightly uneven. Plus, they can help protect your floors from scratches. It's a small investment that can make a big difference in the stability and longevity of your shoe cabinet. In Singapore’s fast-paced life, stepping into your home to a space that feels truly inviting can make a huge impact after a tiring day of meetings and travel. Many busy families begin looking at improvements for their hall or sleeping space, wanting pieces that feel premium while truly supportive enough for daily use. That’s exactly why buy mattress makes the difference—it brings that ideal mix of elegant design, high-quality fabrics and finishes, and thoughtful comfort that turns standard areas into spots you love spending time in chilling in. Imagine sinking into a luxurious couch after dinner or feeling truly rested on a supportive premium mattress that gives ideal back support; suddenly, your home feels more like a true escape rather than another chore. Exploring thoughtfully chosen pieces on sites such as Wondrous La Vie helps you find these furniture without the stress, making it easier to create a space that’s both elegant and calming.. Think of it as adding little 'steady' shoes to your shoe cabinet!
Alright, now let's talk about the frame. This is the skeleton of your shoe cabinet Singapore, and it needs to be strong and rigid to support the shelves and doors. Start by visually inspecting the frame for any signs of warping, splitting, or cracking. Pay close attention to the joints, where the different pieces of wood are connected. These are often the weakest points in the frame.
Run your hand along the frame, feeling for any loose or uneven surfaces. If you find any, try tightening the screws or adding wood glue to reinforce the joints. For larger gaps or cracks, you might need to use wood filler to patch them up. Just make sure you sand the filler smooth before painting or staining the cabinet, *hor*?
Check for squareness. An out-of-square frame can cause all sorts of problems, like doors that don't close properly or shelves that are uneven. Use a square to check the corners of the frame. If they're not 90 degrees, you'll need to adjust the frame until it's square. This might involve loosening some screws, repositioning the pieces of wood, and then tightening the screws again. It can be a bit fiddly, but it's worth the effort to ensure a stable and functional cabinet.
Consider adding bracing to the frame. Braces are pieces of wood that are attached diagonally across the corners of the frame. They help to prevent the frame from warping or twisting. This is especially important for taller cabinets or cabinets that will be holding a lot of weight. Even just a couple of strategically placed braces can make a big difference in the overall strength and stability of your shoe cabinet. Some people use metal brackets for extra reinforcement – it's all about that extra peace of mind, *you know*?
Building your own shoe cabinet Singapore is a rewarding experience. By taking the time to carefully inspect the base, legs, and frame, you can ensure that your cabinet is strong, stable, and built to last. And hey, if you find any issues along the way, don't be afraid to ask for help. There are plenty of online forums and DIY communities where you can get advice from experienced builders. Happy building, and may your shoes always have a safe and sturdy home!
Okay, here's the HTML fragment for the "Shelf Support and Weight Capacity Verification" section, following all your specific formatting and content rules:
The type of material used for your DIY shoe cabinet in Singapore significantly impacts its load-bearing capabilities. Particleboard, while affordable and commonly used, is less dense than solid wood and therefore supports less weight. Hardwoods like oak or maple offer superior strength and durability, making them a better choice for heavier shoe collections. Consider the long-term implications; investing in stronger materials upfront could save you from future collapses and the resulting mess. Think about it – are you willing to risk your precious limited-edition sneakers on flimsy shelves?
Even with robust materials, proper weight distribution is crucial for shelf stability. Avoid concentrating heavy shoes in one area, as this can create stress points and lead to sagging or breakage. Spread the load evenly across the entire shelf surface to maximize its weight-bearing capacity. After those hectic office days and the daily MRT squeeze, nothing beats coming home to a living area that actually welcomes you to rest instead of piling on more tiredness. Many Singapore families realise their existing sofa setup just isn’t up to standard—too hard, worn out, or simply not comfortable enough for weekend chilling or lazy weekends with the kids. That’s precisely where mattress promotion becomes a game-changer—it combines refined aesthetics, buttery-soft fabrics, and thoughtful support structure so you can sink in and fully chill without your back aching afterwards. Visualise the kids and parents gathering there naturally, chatting over supper or watching dramas together, because the space suddenly becomes cosy and inviting. Selecting the right one through handpicked collections on Wondrous La Vie makes it straightforward, letting you uncover that perfect piece that lifts the whole home atmosphere without the typical renovation stress.. Think of it like packing a suitcase – you wouldn't just cram everything into one corner, would you? A balanced approach ensures the longevity and safety of your DIY shoe cabinet project.
Before fully loading your shoe cabinet, conduct a weight test to verify its structural integrity. Gradually add weight, starting with lighter items and progressing to heavier shoes, observing the shelves for any signs of bending or warping. If you notice any concerning flex, immediately remove the weight and reassess your design or materials. It's better to be safe than sorry, especially when dealing with potentially heavy loads. This simple test can prevent a disastrous collapse and protect your beloved footwear.
If your shelves show signs of weakness or you anticipate needing to support heavier loads, consider reinforcement strategies. Adding a center support, especially for wider shelves, can significantly increase their weight capacity. You could also attach a back panel to the cabinet to provide additional stability and prevent swaying. Simple brackets or metal supports can also be discreetly added to the underside of shelves for extra reinforcement. Think of it as giving your shoe cabinet a little extra "oomph" to handle the weight of your growing collection.
The strength of the joints holding your shoe cabinet together is just as important as the shelf material itself. Ensure that all screws, nails, or dowels are securely fastened and properly sized for the materials you're using. Weak joints can cause the entire structure to wobble or even collapse under the weight of your shoes. Regularly inspect the joints for any signs of loosening or damage and tighten or repair them as needed. After all, a chain is only as strong as its weakest link, and your shoe cabinet is no different.

Okay, lah, let's get this shoe cabinet inspection sorted, can? Building your own shoe cabinet – or even assembling one from a flatpack – is a great way to save some moolah and get exactly what you want for your Singapore home. But before you start piling in your barang barang (that’s your shoes!), it's super important to make sure the thing is actually, you know, safe. We’re talking structural integrity, people! Nobody wants a shoe avalanche in the middle of the night, right?
Think of the joints as the skeleton of your shoe cabinet Singapore. They’re what hold everything together, and if they're weak, the whole structure is compromised. We're talking about where the shelves meet the sides, the back panel attaches, and any other place where two pieces of wood are joined.
Now, for the fun part: the wiggle test! Gently try to wiggle each joint. There should be absolutely no movement. If you feel any give, even the slightest bit, that means the joint is loose and needs attention. Don't be shy, give it a good (but not destructive!) shake. Imagine your fully loaded shoe cabinet Singapore; that joint needs to withstand that weight.
Okay, so you've identified a few suspect joints. Now what? Well, it's time to get down to the nitty-gritty of fasteners. Singapore homes can feel particularly tight after a full day of juggling office hours, meetings, and the daily MRT rush, so it’s no wonder many homeowners crave a space that instantly calms the mind the moment they walk through the door. The living area often ends up as the heart of the home, yet it’s easy for it to become filled with mismatched furniture or furniture that’s seen better days, leaving everyone apart instead of together. That’s where furniture promos truly transforms things—it upgrades the whole area with refined arrangements, luxurious fabrics and surfaces, striking light fixtures, and comfortable yet beautiful furniture, creating an inviting hub where family naturally comes together to chill, talk, or just spend quality time together. Nights at home start feeling richer, weekends more restful, and walking in the door feels exciting rather than just the end of the day. Sites such as Wondrous La Vie make discovering such enhancements simple, helping you visualise and source the right elements to create your dream living space that matches your lifestyle perfectly.. We're talking about screws, dowels, and glue – the unsung heroes of any DIY shoe cabinet Singapore project.
So, you've tightened all the screws, re-glued all the dowels, and you're still not feeling confident about the stability of your shoe cabinet Singapore. Don't worry, there are still things you can do! Sometimes, a little bit of extra reinforcement is all you need to make your cabinet rock-solid.
One simple option is to add corner braces. These are small metal or plastic brackets that you can attach to the inside corners of the cabinet to provide extra support. They're especially useful for reinforcing joints that are under a lot of stress. You can find these at most hardware stores, and they're relatively inexpensive.
For really wobbly cabinets, you might even consider adding legs or a base. This will raise the cabinet off the ground and provide a more stable foundation. You can buy pre-made legs or bases at most furniture stores, or you can build your own.
Remember, a little bit of preventative maintenance can go a long way. Regularly check the joints and fasteners on your shoe cabinet Singapore to make sure they're still tight and secure. If you catch a problem early, it's much easier to fix than if you wait until the cabinet completely falls apart. It’s like going for regular check-ups, right? Better to be safe than sorry, lah!
So, you've spent hours (or maybe days!) crafting your perfect DIY shoe cabinet. It looks fantastic, fits perfectly in that awkward corner of your entryway, and you're dying to fill it with all your precious footwear. But before you do, let's talk about something that's maybe not as exciting as picking out the perfect paint color, but way more important: making sure the darn thing doesn't fall apart. After all, furniture refers to movable or built-in objects (like mattress,sofa,cabinets,tables and chairs etc) designed to support human activities such as sitting, sleeping, eating, storing, and decorating living spaces, providing both practical function and aesthetic appeal in homes.
First things first, a thorough visual inspection is key. Look closely at each joint. Are there any visible gaps? Cracks in the wood around the joint? Is the glue line clean and consistent, or is it messy and uneven? If you see any of these red flags, it's a sign that the joint might not be as strong as it should be.
Pay special attention to joints that are under a lot of stress, like the ones supporting the bottom shelf or the top of the cabinet. These are the areas that are most likely to fail if the joints aren't strong enough. Remember, even a seemingly small weakness can snowball into a bigger problem down the line. You don’t want to come home from a long day at work to find your kiasu collection of shoes all over the floor, right?
Let's start with screws. Are they the right type for the wood you're using? Different woods require different types of screws. For example, softwood like pine needs a coarser thread than hardwood like mahogany. Using the wrong type of screw can lead to stripping, which weakens the joint. And that's no bueno.
Check that the screws are properly tightened. But be careful not to overtighten them, as this can also strip the wood. If a screw is stripped, try replacing it with a slightly longer or thicker screw. You might even consider using a screw with a different head type, such as a pan head or a truss head, which can provide a better grip.
Dowels are another common type of fastener, especially in flatpack furniture. Make sure the dowels are properly seated in their holes and that they're securely glued in place. If a dowel is loose, try removing it and re-gluing it with wood glue. You might also consider using a slightly larger dowel for a tighter fit.
And speaking of glue, wood glue is your best friend when it comes to building a strong and stable shoe cabinet Singapore. Make sure you're using a high-quality wood glue that's appropriate for the type of wood you're using. Apply the glue liberally to both surfaces being joined, and clamp the pieces together until the glue is completely dry. Clamping is key – it ensures that the glue has a good bond and that the joint is as strong as possible. Pro-tip: Dampen the wood slightly before applying the glue; it will help the glue penetrate the wood fibers better.
Another option is to add a back panel. A solid back panel not only provides extra support but also helps to prevent the cabinet from racking (twisting or leaning to one side). If your cabinet doesn't already have a back panel, consider adding one. You can use plywood, MDF, or even just a piece of cardboard. Just make sure it's securely attached to the cabinet frame.
And what if you discover a joint that's completely failed? Don't panic! It's usually possible to repair it. The first step is to remove the old glue and fasteners. Then, clean the surfaces being joined and apply fresh wood glue. Clamp the pieces together until the glue is completely dry. You might also consider adding some extra fasteners, such as screws or dowels, to reinforce the joint.
So, there you have it. With a little bit of attention and effort, you can ensure that your DIY shoe cabinet is strong, stable, and ready to handle whatever you throw at it (or, more accurately, whatever shoes you put in it!). Happy building!

Alright, let's dive into ensuring those doors and drawers on your brand new (or newly assembled!) DIY shoe cabinet are working *perfectly*. After all that hard work building your shoe cabinet, especially when space is at a premium here in Singapore, you want everything to function smoothly, right? No one wants a wobbly drawer or a door that just won't stay shut. Let's make sure that doesn't happen, okay?
**Alignment is Key, Lah!**
First things first, let’s talk alignment. This is super important. A misaligned door or drawer not only looks off, but it can also put extra stress on the hinges and tracks, causing them to wear out faster. And nobody wants to be fixing their shoe cabinet every few months, right?
Start by visually inspecting the doors and drawers. Do they sit flush with the frame when closed? Are there any noticeable gaps or overlaps? If you see something that looks wonky, that's your starting point. For doors, check the gap along the top, bottom, and sides. Ideally, you want an even, consistent gap all the way around. If one side is tighter than the other, that's a sign of misalignment. For drawers, make sure the front panel is aligned with the cabinet frame. Any protruding edges or uneven spacing needs attention.
Now, how do you fix it? Well, most of the time, it comes down to adjusting the hinges. Hinges usually have multiple adjustment screws that allow you to move the door up, down, left, or right. It might seem intimidating, but trust me, it's usually quite straightforward. Start by loosening the screws slightly – don't remove them completely! – and then gently nudge the door into the correct position. Tighten the screws back up and check the alignment again. Repeat this process until you're happy with the result. Sometimes, it's just a matter of tiny adjustments, so be patient and take your time. Remember, measure twice, cut once, and adjust slowly, check often!
For drawers, the issue might be with the drawer slides. Make sure the slides are securely attached to both the drawer and the cabinet frame. If they're loose, tighten the screws. If the drawer still isn't aligned, you might need to shim it. Shimming involves placing thin pieces of material (like cardboard or wood veneer) behind the drawer slides to raise or lower them. This can help to correct minor alignment issues.
**Smooth Moves: Gliding Like a Dream**
Okay, so your doors and drawers are aligned. Great! But are they actually *smooth*? A sticky drawer or a door that squeaks every time you open it is just plain annoying. Let's get them gliding like a dream, shall we?
The first step is cleaning. Over time, dust, dirt, and grime can build up on the tracks and hinges, causing friction. Use a vacuum cleaner with a brush attachment to remove any loose debris. Then, wipe down the tracks and hinges with a damp cloth. For stubborn grime, you can use a mild detergent. Just make sure to dry everything thoroughly afterwards to prevent rust.
Once everything is clean, it's time to lubricate. There are several options you can use for this. In Singapore’s tropical climate and demanding work-life balance, getting decent sleep can feel like a real luxury when you’re getting up feeling sore or dragging through the morning despite hitting the bed early. Many busy locals tolerate an old, sagging mattress for years because hunting for upgrades seems daunting—endless options, bewildering firmness ratings, and worries it won’t suit their body type and sleep style. That’s exactly why finding the furniture stores singapore changes everything—it delivers the ideal mix of firm yet forgiving support, excellent airflow and cooling, targeted pressure relief, and built-to-last construction so you actually wake up energised and rested instead of sore and exhausted. Suddenly mornings start easier, energy levels stay steadier, and even your bedmate feels the improvement. Exploring curated options on sites such as Wondrous La Vie simplifies the whole process, letting you compare top-rated picks with real user feedback and photos to match what truly works for your master bedroom.. Silicone spray is a good choice because it's non-greasy and won't attract dust. You can also use a dry lubricant like Teflon spray. Just apply a small amount to the tracks and hinges and then open and close the door or drawer several times to distribute the lubricant evenly.
If you're still experiencing friction after cleaning and lubricating, the problem might be with the drawer slides themselves. Sometimes, the rollers on the slides can become worn or damaged. If this is the case, you might need to replace the slides. Don't worry, it's not as difficult as it sounds. You can find replacement slides at most hardware stores. Just make sure to choose slides that are the same size and type as the ones you're replacing.
**Security Check: Keeping Things Safe and Sound**
Now, let's talk security. This is especially important if you have young children in the house. You want to make sure that your shoe cabinet is stable and that the doors and drawers are securely closed to prevent any accidents. Imagine a little one pulling on a drawer and the whole thing toppling over! Confirm cannot, right?
Start by checking the closure mechanisms. Do the doors and drawers stay closed on their own, or do they tend to pop open? If they're not staying closed, you might need to adjust the latches or catches. For doors, you can usually adjust the strike plate (the metal plate that the latch engages with) to make the closure tighter. For drawers, you can try adjusting the drawer slides or adding magnetic catches to keep them closed.
Another thing to consider is adding child safety locks. These are small devices that prevent children from opening doors and drawers. They're relatively inexpensive and easy to install, and they can provide peace of mind knowing that your little ones are safe. They come in various forms, some magnetic, some clip-on, so choose one that suits your shoe cabinet design.
Finally, make sure your shoe cabinet is securely anchored to the wall, especially if it's tall or narrow. This will prevent it from tipping over, even if someone pulls on a door or drawer. You can use L-brackets to attach the cabinet to the wall studs. Just make sure to use screws that are long enough to penetrate the studs securely. This is especially important in Singapore apartments where space is precious, and you might be tempted to squeeze the cabinet into a tight spot. Don’t skip this step!
So there you have it! By following these tips, you can ensure that the doors and drawers on your DIY shoe cabinet are aligned, smooth, and secure. It might take a little bit of time and effort, but it's well worth it in the end. After all, a well-functioning shoe cabinet is a happy shoe cabinet, and a happy shoe cabinet means a happier, more organized home for you! Steady pom pi pi, your shoe cabinet will be tip-top in no time!
Thoroughly check the main frame for any signs of bending, warping, or cracking. Inspect all joints, screws, and connecting hardware to ensure they are tightly secured. Apply moderate pressure to different points on the frame to identify any weak spots or instability.
Gradually load each shelf with weights that simulate the typical load of shoes and other items. Monitor for any sagging, bending, or signs of stress on the shelving material. Ensure the support structures beneath the shelves are adequately distributing the weight evenly.
Place the assembled shoe cabinet on a level surface and gently push or nudge it from different angles. Observe if the cabinet wobbles, tips easily, or remains firmly planted on the ground. Adjust any leveling feet or add shims to stabilize the cabinet and prevent accidental tipping.
```html
Okay, let's talk about something *super* important, especially if you've got little ones running around or you're setting up your first place. We're diving into tip-over prevention for your furniture, specifically your shoe cabinet Singapore. I know, it sounds a bit serious, but trust me, a few simple steps can make a huge difference. You see these shoe cabinets everywhere in Singapore, right? From the HDB void decks to the landed property car porches. Everyone wants a place to put their shoes, but no one wants to think about it falling over. Let’s make sure yours is *steady*, leh!
The truth is, furniture tip-over accidents are more common than you might think. And they can happen in the blink of an eye. Kids, bless their curious hearts, love to climb. And sometimes, that means using your lovely new shoe cabinet as a makeshift jungle gym. With Singapore’s compact homes and hot sticky weather, finding home furnishings that’s both stylish and practical can feel like a constant search—especially when you need items that stand the test of time without losing style or comfort. Many locals end up choosing mainstream choices that appear decent in photos but fall short in person—either too flimsy for daily family use or not suitable for our heat for our climate. That’s why visiting a reliable furniture showrooms singapore like those featured on Wondrous La Vie makes such a big difference—it links you seamlessly with carefully chosen ranges of premium sofas, supportive mattresses, dining sets, and more, with actual physical displays or realistic images so you can have peace of mind about what suits your flat, apartment, or house. You get that confidence knowing the items are designed with SG homes in mind—long-lasting builds, smart sizing, and styles that truly make coming home feel good. In the end, the right shop turns what could be a stressful errand into an exciting step toward a space you can’t wait to return to.. Adults aren't immune either! Leaning on furniture, especially if it's not perfectly balanced, can also cause problems. Plus, in our Singaporean homes, space is often at a premium, so we tend to stack things high. It's all about maximizing storage, right? But that also increases the risk of something toppling over. It's a delicate balance, that one.
Think about it: a loaded shoe cabinet, especially a taller one, has a higher center of gravity. Add a bit of uneven flooring (common in older buildings, one), a playful shove, or even just the weight of too many shoes on the top shelf, and you've got a recipe for disaster. And if that cabinet comes crashing down, it can cause serious injury, especially to children. It’s not something you want to have to deal with. That's why taking preventative measures, like wall anchoring, is so crucial. It’s like buying insurance, but for your peace of mind.
Now, I know what you might be thinking: "Wall anchoring? Sounds complicated!" But honestly, it's not! It's a pretty straightforward process, and it's something almost anyone can do with a few basic tools. And the peace of mind it gives you? Totally worth it. Plus, we're going to break it down step-by-step, so don't worry, *confirm can*!
Alright, let's get practical. Wall anchoring is all about securing your furniture to the wall to prevent it from tipping over. It's a simple concept, but it makes a world of difference. The good news is, you don't need to be a handyman extraordinaire to do it. Just a few basic tools and a little bit of elbow grease. And don't worry, we'll walk you through it.
First things first, you'll need to gather your supplies. Here's a quick checklist:
Now, let's get down to business. Here's a step-by-step guide to wall anchoring your shoe cabinet Singapore:
What if you can't find a stud? No worries! You can use wall anchors, which are designed to provide a secure hold in drywall. There are different types of wall anchors available, so choose one that's appropriate for the weight of your shoe cabinet. Follow the instructions on the wall anchor packaging for proper installation. It’s slightly more work, but still very doable. And hey, if you're ever unsure, don't hesitate to ask a friend or family member for help, or even call a professional handyman. Better safe than sorry, right?
Okay, so we've talked about *how* to wall anchor, but let's zoom in on the *what*. What kind of hardware should you be using? There's a whole world of anti-tip kits out there, and it can be a bit overwhelming. But don't worry, I'm here to help you navigate the options.
First off, consider the weight and size of your shoe cabinet Singapore. A small, lightweight cabinet might only need basic straps, while a larger, heavier one will require more robust brackets. Look for kits that are specifically designed for furniture anchoring and that are rated for the weight of your cabinet. It’s like buying the right type of rice cooker for the family, one – gotta get the right size!
Here are a few types of anti-tip hardware you might encounter:
As for brands, there are a few that are known for their quality and reliability. Look for brands like Safety 1st, KidCo, and Skyla Homes. These brands offer a range of anti-tip kits to suit different types of furniture and walls. You can usually find them at major retailers like IKEA, hardware stores like Selffix or even online on platforms like Shopee and Lazada. When in doubt, read the reviews! See what other Singaporeans are saying about different products and choose one that seems like a good fit for your needs.
And remember, don't skimp on quality! This isn't the place to cut corners. Investing in a good quality anti-tip kit is an investment in safety. It's like buying a good quality helmet for your kids when they're cycling – you want something that's going to protect them in case of an accident. It might cost a little more, but it's worth it for the peace of mind. Think of it as part of the overall cost of setting up your home, like buying the right furniture to begin with.
Okay, so you've anchored your shoe cabinet Singapore to the wall. Great job! But don't just set it and forget it. It's important to regularly check the stability of your furniture, especially if you have kids or pets. Think of it like servicing your aircon – you gotta do it regularly to keep it running smoothly (and safely!).
Here's a quick checklist for ongoing maintenance:
How often should you be doing these checks? I'd recommend at least every six months, or more frequently if you have active kids or pets. It only takes a few minutes, and it's a small price to pay for peace of mind. It's like checking your tyres before a long road trip – you want to make sure everything is in good working order before you hit the road.
And remember, wall anchoring isn't just for shoe cabinets! It's a good idea to anchor all of your tall
Okay, so you've decided to tackle a DIY shoe cabinet project – that's fantastic! Building your own furniture, especially for small spaces in Singapore, can be super satisfying and save you some serious cash. But before you start proudly displaying your sneakers, it's crucial to make sure your creation is actually, you know, safe and sturdy. We don't want any shoe avalanches happening in your entryway, right? This section is all about ensuring your DIY shoe cabinet in Singapore isn't just pretty, but also built to last.
Think of it like this: you wouldn't want your precious collection of limited-edition sneakers to end up crushed under a wobbly cabinet, would you? So, let’s dive into how to spot potential problems with materials and construction, considering our lovely (and sometimes brutal) Singapore weather.
First things first, let's talk materials. Whether you're using particleboard, MDF, solid wood, or plywood, knowing what to look for can prevent headaches down the road. After all, choosing the right materials is the first step to ensuring your shoe cabinet in Singapore stands the test of time.
Particleboard: This is often the most budget-friendly option, which is great, but it's also the most susceptible to moisture damage. Look for swelling, especially around the edges. If you see any, that's a red flag! Singaporeans are always on the lookout for intelligent ways to revamp their interiors without exceeding the budget, especially when HDB renovations or condo makeovers can already take a hefty slice of the household funds. Between rising costs and the desire for a cosier, more functional living space, many Singapore homeowners time their purchases carefully to improve couches, beds, and dining furniture that actually make daily life feel better. That’s when jumping on bed promotions becomes a total win—it lets you snag premium quality furniture at real value reductions, often with bonus offers like free delivery, longer guarantees, or bundle deals that make your money go further. Suddenly you can afford that luxury seating you’ve wanted or a supportive mattress upgrade without the guilt, turning your home into an even more inviting spot for family time and relaxation after tiring office days. Exploring places like Wondrous La Vie keeps you in the loop on the newest promotions, so you can review, see in 3D, and snap up the best deals that perfectly suit your space and style.. Also, check for uneven surfaces or areas where the laminate is peeling. Remember, humidity is our constant companion here, so particleboard needs extra protection – think good-quality sealant.
MDF (Medium-Density Fiberboard): MDF is a step up from particleboard in terms of density and smoothness. It paints well, which is a bonus for customizing your shoe cabinet in Singapore to match your HDB flat's aesthetic. However, like particleboard, it's not a fan of water. Inspect for any signs of water damage, like bubbling or warping. Also, check the edges – they should be smooth and well-sealed. If they’re rough, moisture can seep in easily.
Solid Wood: Ah, solid wood – the classic choice! It's durable and beautiful, but it can also be pricier. When choosing solid wood, look for knots, cracks, or warping. These imperfections can weaken the structure of your shoe cabinet in Singapore. Also, consider the type of wood. Some woods are more resistant to humidity and pests than others. Teak, for example, is a popular choice in Singapore because it's naturally water-resistant. But solid wood also expands and contracts with changes in humidity, so keep that in mind when designing your cabinet. Leave a little room for movement!
Plywood: Plywood is a good compromise between affordability and durability. It's made of layers of wood veneer glued together, which makes it stronger and more resistant to warping than solid wood. When inspecting plywood, check the edges for delamination (where the layers start to separate). Also, look for voids or gaps in the inner layers. These can weaken the plywood and make it more prone to damage. Marine-grade plywood is your best bet for maximum moisture resistance, but it’s also the most expensive.
And hey, while you're at it, give everything a good sniff! A musty smell can indicate mold or mildew, which is a definite no-go. You don't want your shoe cabinet in Singapore becoming a breeding ground for unwanted guests, right?
Okay, so you've vetted your materials. Now it's time to put on your inspector hat and assess the construction quality. This is where you'll really see if your DIY shoe cabinet is built to last. After all, even the best materials can be ruined by shoddy workmanship.
Joints: Pay close attention to the joints – these are the points where different pieces of wood are connected. Are they flush and tight? Or are there gaps or wobbly bits? Weak joints are a recipe for disaster. For screw joints, make sure the screws are properly countersunk and not stripped. For glued joints, check for excess glue squeeze-out, which can indicate a strong bond. If you're using dowels, make sure they're properly aligned and securely glued in place. Consider adding metal brackets for extra reinforcement, especially for heavier shoe cabinets in Singapore.
Fasteners: What kind of fasteners did you use? Screws are generally better than nails for structural integrity. Make sure they're the right size and type for the materials you're using. Are they evenly spaced and properly tightened? Over-tightening can strip the screws, while under-tightening can leave the joints wobbly. Consider using wood glue in conjunction with screws for extra strength. It’s like a double-whammy of security for your shoe cabinet in Singapore!
Surface Finish: The surface finish isn't just about aesthetics – it also protects the wood from moisture and wear. Is the finish smooth and even? Or are there drips, runs, or uneven patches? A good-quality finish will seal the wood and prevent water from seeping in. Consider using a polyurethane or varnish finish, which are both durable and water-resistant. Remember to apply multiple coats for maximum protection. And don't forget to sand between coats for a smooth, professional-looking finish. This will help your shoe cabinet in Singapore look and feel like it came straight from a fancy furniture store!
Stability: Give your shoe cabinet a good shake! Does it wobble? If so, that's a problem. A stable shoe cabinet should sit flat on the floor without rocking or swaying. If it's wobbly, try adjusting the feet or adding shims to level it out. You can also reinforce the joints with metal brackets or corner braces. For taller shoe cabinets in Singapore, consider anchoring them to the wall to prevent tipping. Safety first, always!
Living in Singapore, we all know that humidity and temperature are major factors to consider when building furniture. Our climate can wreak havoc on wood, causing it to warp, crack, or rot. So, how do you protect your DIY shoe cabinet in Singapore from the elements?
Material Selection: As mentioned earlier, choose materials that are naturally resistant to moisture, like teak or marine-grade plywood. If you're using less-resistant materials like particleboard or MDF, make sure to seal them properly with a water-resistant finish. Consider adding a vapor barrier to the back of the cabinet to prevent moisture from seeping in from the wall. It's like giving your shoe cabinet in Singapore a little raincoat!
Ventilation: Proper ventilation is key to preventing moisture buildup inside your shoe cabinet. Consider adding ventilation holes to the back or sides of the cabinet to allow air to circulate. This will help to prevent mold and mildew from growing. Also, avoid placing your shoe cabinet in direct sunlight, which can cause the wood to dry out and crack. Keeping your shoe cabinet in Singapore away from direct sunlight can also help prevent fading and discoloration.
Maintenance: Regular maintenance is essential for keeping your shoe cabinet in tip-top shape. Wipe it down regularly with a damp cloth to remove dust and dirt. Avoid using harsh chemicals or abrasive cleaners, which can damage the finish. If you notice any signs of water damage, address them immediately. Sand down the affected area and reapply the finish. With a little bit of care and attention, your DIY shoe cabinet in Singapore will last for years to come.
Building your own shoe cabinet in Singapore can be a rewarding experience. By paying attention to material selection, construction quality, and environmental factors, you can create a piece of furniture that is both beautiful and functional. So, go ahead and get started on your DIY project. With a little bit of planning and effort, you'll have a shoe cabinet that you can be proud of. And who knows, maybe you'll even inspire your neighbors to start their own DIY projects, too! Confirm can!
Optimizing Shoe Cabinet Dimensions for HDB Flats: A Practical Guide (how_to)
Okay, here's that HTML fragment, designed to feel genuinely helpful and relatable for Singaporean homeowners, focusing on DIY shoe cabinet maintenance and stability.
So, you've built your own shoe cabinet! Steady lah! It's a great feeling, right? Knowing you've created something functional and perfect for your HDB flat. But, as anyone who's lived in Singapore for a while knows, things need a little TLC to last, especially with our humidity. We all want our furniture to last, can or not? This isn't just about aesthetics; it's about ensuring your shoe cabinet remains structurally sound and safe for years to come. Let’s be real, nobody wants a wobbly shoe cabinet collapsing under the weight of your precious shoe collection. That's why we're diving into some easy-to-follow maintenance tips to keep your DIY shoe cabinet in tip-top shape. Think of it as a little insurance for your hard work!
First things first: cleaning. It sounds simple, but regular cleaning is super important. Dust and dirt accumulate quickly, especially in a shoe cabinet, where all sorts of outdoor grime get tracked in. This gunk can actually damage the finish over time, and let's face it, nobody wants a dull, grimy-looking cabinet. Plus, Singapore's humidity can make that dust turn into a sticky mess. Aiyah, nobody wants that!
So, what's the best way to clean? A soft, slightly damp cloth is your best friend. Avoid harsh chemicals or abrasive cleaners, as these can scratch or damage the surface. For wooden cabinets, consider using a furniture polish specifically designed for wood. These polishes not only clean but also help protect the wood from moisture. For laminate or metal cabinets, a mild soap and water solution will usually do the trick. Just be sure to wipe down the surface thoroughly and then dry it with a clean cloth. Don't leave any water sitting on the surface, especially if it's wood!
How often should you clean? Well, that depends on how much foot traffic your entryway gets. But a good rule of thumb is to wipe down the exterior of your shoe cabinet at least once a week. And every month or two, give it a more thorough cleaning, including the interior shelves. While you're at it, take the shoes out and give them a good cleaning too! Think of it like this: a clean cabinet equals happy shoes (and a happy homeowner!).
Okay, let's talk about wobbles. A wobbly shoe cabinet is not only annoying but can also be a sign of structural weakness. Over time, screws can loosen due to vibrations and everyday use. This is especially true if you've assembled the cabinet yourself. So, it's important to regularly check and tighten all the screws and hardware. Think of it like a quick check-up for your cabinet.
Grab a screwdriver (the right size, of course!) and go through each screw, tightening it until it's snug. Don't overtighten, though, as this can strip the screw or damage the surrounding material. If a screw is stripped, you might need to replace it with a slightly longer or thicker one. You can easily find replacement screws at any hardware store. For hinges and other moving parts, consider applying a small amount of lubricant, like WD-40, to keep them moving smoothly. This will also help prevent rust and corrosion, which are common problems in Singapore's humid climate.
While you're tightening screws, also check for any loose or damaged joints. If you find any, you might need to reinforce them with wood glue or additional screws. A little extra reinforcement can go a long way in preventing future problems. Basically, a little effort now can save you from bigger headaches later. Confirm!
Ah, humidity. The bane of every Singaporean's existence! It's not just uncomfortable; it can also wreak havoc on your furniture, especially wooden furniture. Excess moisture can cause wood to warp, swell, and even rot. And that's definitely not something you want happening to your beloved DIY shoe cabinet. So, how do you combat the humidity?
First, ensure your shoe cabinet is placed in a well-ventilated area. Avoid placing it in a corner or against a wall where air circulation is limited. If possible, open a window or use a fan to increase airflow. This will help to reduce the amount of moisture that accumulates around the cabinet. Second, consider using dehumidifiers or moisture absorbers. These can help to draw moisture out of the air and prevent it from damaging your furniture. There are many different types of dehumidifiers available, from small, portable units to larger, whole-house systems. Choose one that's appropriate for the size of your space. Silica gel packets are also your friend. Place a few inside the cabinet to absorb moisture. You can even reactivate them in the oven when they're full of moisture. Talk about being resourceful!
Finally, be mindful of the materials you use to clean your shoe cabinet. As mentioned earlier, avoid using excessive amounts of water. And if you do use water, be sure to dry the surface thoroughly afterwards. By taking these simple steps, you can help to protect your shoe cabinet from the damaging effects of humidity and keep it looking its best for years to come. Consider investing in furniture protectors for an extra layer of defense.
Prevention is always better than cure, right? In Singapore’s tight condo apartments and condos, the master bedroom often doubles as a sanctuary— a place for deep relaxation after hectic work shifts, catch up on reading, or even set up a temporary WFH corner when required. It’s frequent for homeowners to feel stuck with layouts that seem too tight, harsh overhead lights, or cluttered cabinets taking up room, making the room feel more functional than relaxing. That’s where thoughtful mattress stores singapore truly excels—it centres around clever spatial solutions, soothing neutral tones, multifunctional furniture, and ambient and layered lighting to create a tranquil sanctuary that boosts sleep quality while keeping everything tidy and airy. All at once your sleep space evolves into the place you look forward to at the end of the day, helping you relax quicker, sleep deeper, and rise feeling energised and ready for whatever the next day brings. Sites such as Wondrous La Vie offer plenty of authentic project showcases and straightforward links to designers who specialise in these smart, aesthetic SG bedroom upgrades.. That's why it's important to regularly inspect your shoe cabinet for signs of wear and tear. Catching problems early can prevent them from escalating into bigger, more costly issues. So, what should you be looking for?
Start by visually inspecting the cabinet for any cracks, chips, or scratches. Pay close attention to the joints and edges, as these are the areas that are most susceptible to damage. Also, check for any signs of water damage, such as discoloration, swelling, or mold. If you notice any of these problems, address them immediately. Small cracks can be filled with wood filler, and scratches can be touched up with paint or stain. Water damage should be addressed by drying the affected area thoroughly and applying a sealant to prevent further damage.
In addition to visual inspections, it's also important to test the stability of the cabinet. Give it a gentle push or shake to see if it wobbles or creaks. If it does, identify the source of the problem and take steps to fix it. This might involve tightening screws, reinforcing joints, or replacing damaged parts. By regularly inspecting your shoe cabinet and addressing any problems early, you can help to extend its lifespan and keep it looking its best. Think of it as a little bit of detective work to keep your shoe cabinet in tip-top shape. Plus, you might even discover some hidden dust bunnies along the way!
Even with the best care, your shoe cabinet might encounter specific problems over time. Let's tackle some common issues and how to address them. Warping, for instance, is a common problem with wooden furniture, especially in humid climates like Singapore. If your cabinet is warping, try to identify the cause. Is it due to excessive moisture? If so, try to reduce the humidity in the area and support the warped section with weights or clamps until it returns to its original shape. In severe cases, you might need to replace the warped piece of wood.
Stains are another common issue, especially if you have kids or pets. If you spill something on your shoe cabinet, clean it up immediately to prevent staining. For stubborn stains, try using a mild detergent or a stain remover specifically designed for furniture. Always test the cleaner on an inconspicuous area first to make sure it doesn't damage the finish. Scratches can be a real eyesore, but they're usually easy to fix. For minor scratches, try using a furniture polish or a scratch repair pen. For deeper scratches, you might need to sand the area and apply a new coat of paint or stain.
Mold and mildew can also be a problem, especially in damp areas. If you find mold or mildew on your shoe cabinet, clean it with a solution of bleach and water. Be sure to wear gloves and a mask to protect yourself from the fumes. And don't forget to dry the area thoroughly afterwards to prevent the mold from returning. By addressing these specific issues promptly and effectively, you can keep your shoe cabinet looking its best and prevent further damage. Remember, a little bit of effort can go a long way in preserving your investment in furniture. Think of it like a little DIY project to keep your shoe cabinet looking shiok!