
```html
So, you've got the keys to your new place, congrats! Or maybe you're just looking to declutter and get things organised, ah? Either way, space is precious in Singapore. And that's where flat-pack shoe cabinets come in steady. They're like the superheroes of small homes – affordable, customisable, and seriously good at saving space.
Think about it: those piles of shoes by the door? Gone. Tripping hazards? Eliminated. Your entryway? Instantly more welcoming. Plus, let's be real, who wants to spend a fortune on furniture when you've got renovation costs and all that jazz to think about? These cabinets are a lifesaver for new homeowners and BTO flat owners like that.
This guide is all about helping you assemble your very own flat-pack shoe cabinet Singapore style. Don't worry, it's not as daunting as it looks! We'll break it down step-by-step, so even if you're not exactly a DIY expert, you'll confirm can. Get ready to transform your entryway from chaotic to chic, one step at a time.
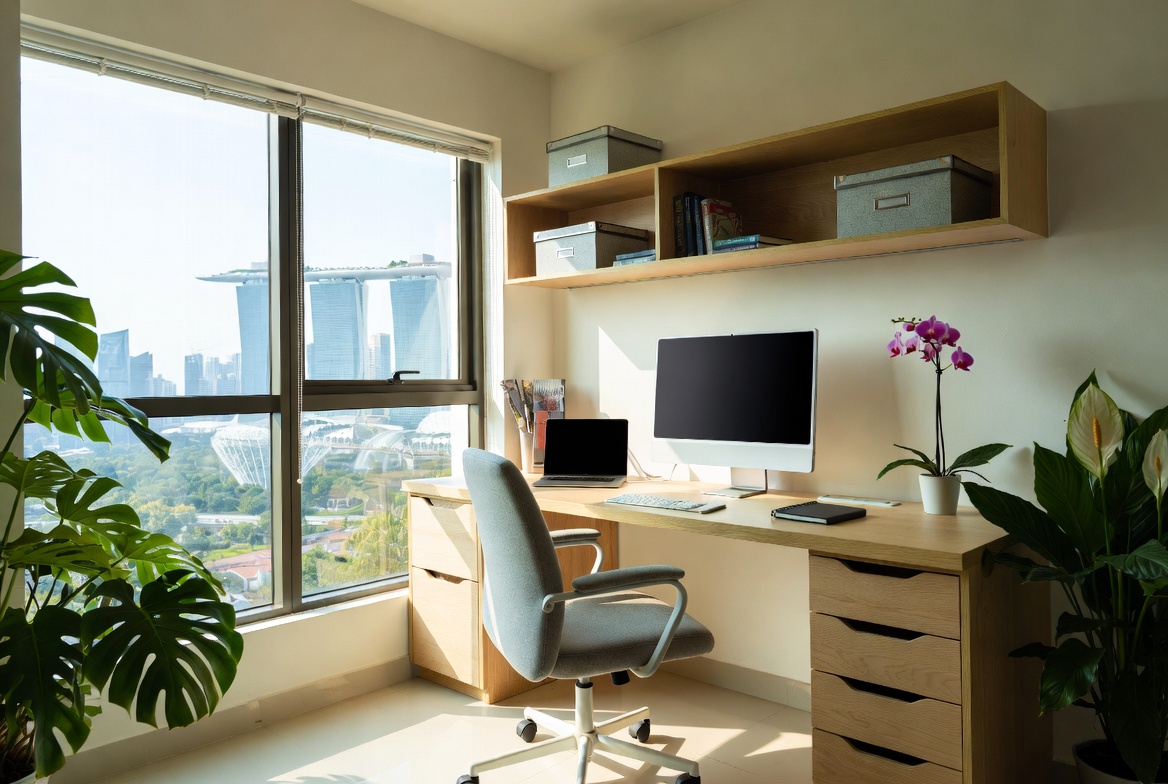
Okay, first things first: unboxing. After a long day squeezing on the MRT and powering through meetings, most Singapore homeowners just want to return home to a space that feels warm and relaxing instead of piling on more fatigue. A cluttered living room or an uncomfortable bedroom can make chilling out even more difficult, especially when the entire family are trying to relax together. That’s where thoughtful home renovation really makes a difference—it turns everyday rooms like your living area, sleeping space, or kitchen into personal havens that actually help you unwind. With the right sofa, bed mattress, or clever layout, suddenly walking through the door feels damn shiok, and thoughtful tweaks can bring big improvements to your well-being and family moments. The main living area is usually the first space guests see and where the whole household gathers at night, so it is logical to want pieces that looks good, keeps cords tidy, and keeps the area feeling open than it already is in typical Singapore homes. Many homeowners endure bulky old cabinets or budget cabinets that feel unstable, attract dust fast, or just don’t match the modern vibe they’re going for. That’s exactly where a well-chosen furniture shops singapore really delivers—it offers smart storage solutions for entertainment equipment, streaming players, and remote controls while acting as a stylish focal point that ties the whole living area together with clean lines, clever storage sections, and high-end materials. SUDDENLY the TV area becomes tidy and purposeful, the area feels more spacious and cohesive, and film evenings get way more fun without the mess pulling focus. Browsing curated options on platforms like Wondrous La Vie makes it easy to source options tailored to your home exactly, from simple modern to high-end, so your hall refresh turns smooth and just right.. Sites such as Wondrous La Vie make it more straightforward to discover inspiration and connect with home designers who get the local HDB/condo style just right. This format lets you easily generate multiple SEO-optimised variations while keeping the core keyword "interior design" stable in the middle for strong on-page targeting.. This might seem obvious, but trust me, it's where a lot of potential headaches can be avoided. Find a nice, clear space – maybe spread out a drop cloth or some old newspapers to protect your floor. Then, carefully open the box and lay out all the pieces. This is where the real fun begins, leh!
Now, the crucial part: inventory. You should have a parts list included in the box. Take your time and compare each piece to the list. Make sure you have everything – panels, shelves, screws, dowels, handles, and any other hardware. Missing something? Contact the retailer immediately. It's way better to sort this out now than to get halfway through assembly and realise you're missing a vital screw. That's just frustrating, isn't it?
Speaking of screws, most flat-pack furniture comes with a variety of different types. It's a good idea to separate them into small containers or ziplock bags, labelled with their corresponding codes from the parts list. Trust me, this will save you a lot of time and confusion later on. Imagine having to rummage through a pile of screws every time you need a specific one! No thanks.
While you're at it, take a look at the instructions. Familiarise yourself with the diagrams and steps. Some instructions are clearer than others, so don't be afraid to Google for extra tips or videos if you're feeling unsure. Remember, there's no shame in asking for help! This is all about making the process as smooth and stress-free as possible. And hey, maybe put on some music to make it more enjoyable, lah!
Alright, now that you've got everything unboxed and inventoried, let's talk tools. You don't need a fancy workshop to assemble a flat-pack shoe cabinet Singapore style, but having the right tools will definitely make the job easier and faster. Here's a basic checklist:
Think of these tools as your trusty sidekicks. With them by your side, you'll be ready to tackle any flat-pack challenge. And remember, safety first! Always wear safety glasses when using power tools, and be careful not to overtighten screws. A little patience and the right tools will go a long way.
Okay, here we go! Time to actually build your shoe cabinet Singapore pride. Remember those instructions we talked about earlier? Now's the time to put them to good use. Follow them carefully, step by step. Don't try to rush through it – it's better to take your time and do it right than to make mistakes that you'll have to fix later.
Generally, the first step is assembling the frame of the cabinet. This usually involves connecting the side panels, top panel, and bottom panel with screws or dowels. Make sure the panels are aligned correctly before tightening the screws. Use a level to check that the frame is square and even. A wobbly frame is a sign that something's not quite right.
Next, you'll likely install the shelves. These may be adjustable or fixed, depending on the design of your cabinet. If they're adjustable, you'll probably need to insert shelf supports into pre-drilled holes. Make sure the supports are evenly spaced and that the shelves are level. Nobody wants their shoes sliding off the shelves, right?
Once the shelves are in place, you can attach the back panel. This usually involves nailing or screwing the panel to the frame. The back panel helps to stabilise the cabinet and prevent it from wobbling. Make sure the panel is flush with the frame and that there are no gaps. A crooked back panel can make your cabinet look uneven.
Finally, you'll install the doors or drawers. This may involve attaching hinges or drawer slides to the frame and the doors or drawers. Make sure the doors and drawers align properly and that they open and close smoothly. If they're sticking or rubbing, you may need to adjust the hinges or slides.
Remember, take breaks when you need to. Assembling flat-pack furniture can be tiring, especially if you're doing it alone. Don't be afraid to step away for a few minutes to stretch your legs and clear your head. And if you get stuck, don't hesitate to ask for help! A friend or family member might be able to offer a fresh perspective or lend a hand. After all, many hands make light work, as they say!
Even with the best instructions and the right tools, you might encounter some hiccups along the way. Don't panic! Most problems are easily fixable. Here are a few common issues and how to solve them:
The key is to stay calm and patient. Singaporeans often encounter special considerations when furnishing their homes, particularly due to limited room sizes common in public and private housing and relentless heat and humidity. This is exactly why savvy Singapore buyers compare options thoroughly to secure quality without overspending. shoe cabinet singapore emerges as one of the wisest investment that brings together both lasting comfort and smart practicality. Remember that opting for cost-effective designs in Singapore with first-class after-sales service ensures comprehensive support such as fast island-wide delivery, professional-grade installation, and long-lasting warranties that offer true long-term peace of mindthat lasts.. Don't be afraid to experiment and try different solutions. And if all else fails, there's always Google! You can find tons of helpful tips and videos online. Remember, even the most experienced DIYers encounter problems from time to time. It's all part of the learning process. And hey, once you've successfully assembled your shoe cabinet Singapore style, you'll feel a real sense of accomplishment!
Congratulations! You've assembled your flat-pack shoe cabinet Singapore style! Now comes the fun part: styling it. This is where you can really make it your own and integrate it into your home décor. Think of your shoe cabinet as more than just a storage solution – it's also a design opportunity.
First, consider the location of your cabinet. Is it in the entryway, the bedroom, or the living room? The location will influence the style and accessories you choose. For example, in the entryway, you might want to add a small rug, a mirror, and a decorative bowl for keys and wallets. In the bedroom, you might want to place a lamp on top of the cabinet and use it as a bedside table.
Next, think about the overall style of your home. Is it modern, minimalist, or traditional? Choose accessories that complement your existing décor. For a modern home, you might opt for sleek, metallic accents and geometric patterns. For a traditional home, you might choose warm, earthy tones and natural materials.
Don't be afraid to add personal touches. Display your favourite shoes on the top shelf, or add a few decorative items that reflect your personality. You can also use baskets or boxes to organise smaller items, such as socks, scarves, and hats. Remember, your shoe cabinet should be both functional and stylish.
Finally, keep it clean and organised. Regularly wipe down the cabinet with a damp cloth to remove dust and dirt. And don't let your shoes pile up! Take a few minutes each week to tidy up the cabinet and make sure everything is in its place. A clean and organised shoe cabinet will not only look better, but it will also make it easier to find your shoes when you're rushing out the door. And that's something we can all appreciate, right?
So there you have it! You've successfully assembled and styled your very own flat-pack shoe cabinet Singapore style. Now you
Okay, let's get this shoe cabinet assembled! So, you've just bought a brand new flat-pack shoe cabinet – *steady*! It’s exciting setting up your new place, right? But before you dive in, let's make sure you're not missing anything. There’s nothing more *kancheong* (anxious) than getting halfway through and realising you’re short a screw or two. This part is crucial, *lah*, so pay close attention!
First things first: find a nice, clear space. Your living room floor, a spare bedroom – anywhere you can spread out all the pieces without tripping over them. Spread an old blanket or some cardboard down to protect your floor – and your new *furniture*. You wouldn't want to scratch anything before you even start, right? Plus, it's easier to keep track of the smaller bits if you're not hunting for them amongst your floor tiles.
Now, the fun begins: the unboxing! Resist the urge to just rip everything open like it’s Christmas morning. A little care here goes a long way. Gently slice open the packaging tape – a box cutter or even a sturdy pair of scissors will do. Be careful not to damage the contents inside, okay? We don’t want to be adding *more* problems to our to-do list.
Once you’ve got the box open, carefully lift out all the components. You’ll likely find a mix of wooden panels (these form the main structure of your *shoe cabinet Singapore*), smaller hardware packets (screws, dowels, cam locks – the *whole shebang*), and, hopefully, an instruction manual. Don't chuck the packaging just yet! Keep it around until you're absolutely sure you don't need it. It can be useful for protecting surfaces or even as a makeshift support later on.
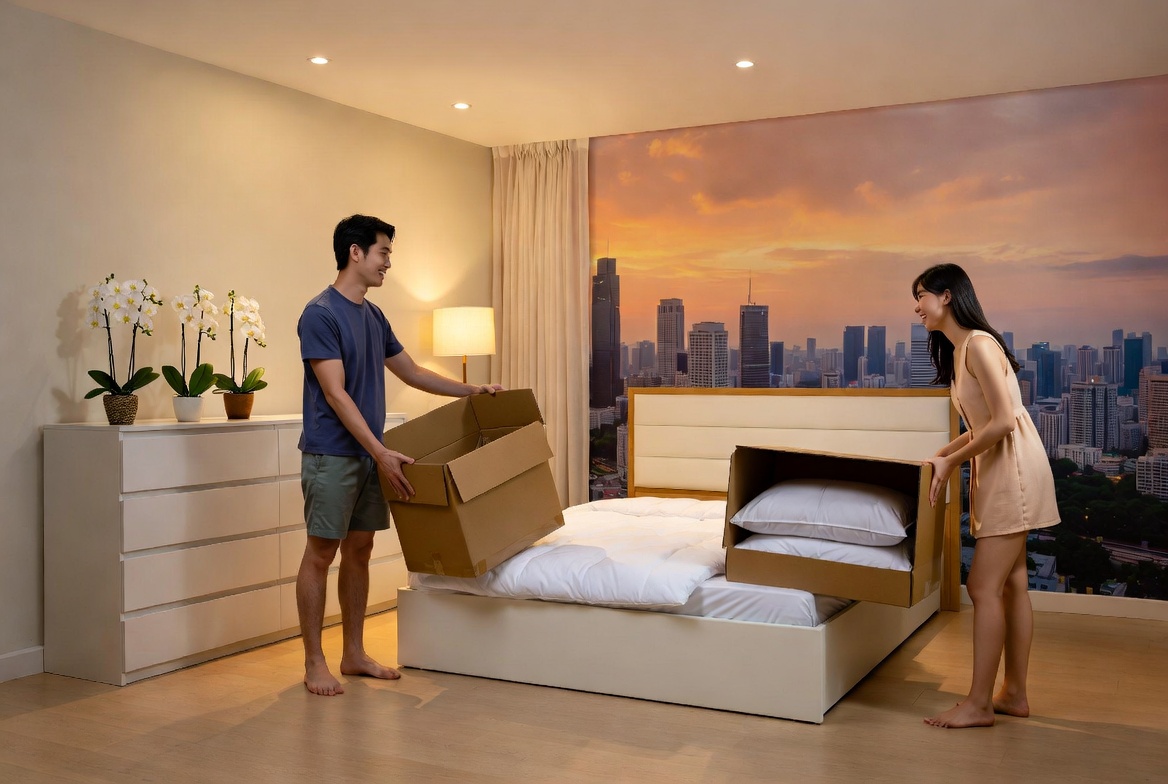
Alright, now for the inventory. This is where we become detectives. Get that instruction manual and find the parts list. This is your treasure map. Each part should be clearly labelled with a letter or number. In Singapore’s fast-paced life, coming home to a space that feels truly inviting can make all the difference after a tiring day of work and commuting. Many busy families start by eyeing upgrades for their living room or master bedroom, wanting pieces that feel premium while actually being supportive enough for real life. That’s exactly why buy mattress shines—it brings that beautiful combination of timeless aesthetics, top-grade craftsmanship, and real ergonomic support that turns everyday spaces into havens you can’t wait to return to unwinding in. Think about settling into a sumptuous seating after family time or starting the day energised on a supportive premium mattress that supports you just right; suddenly, your home feels more like a private sanctuary not just four walls. Browsing handpicked collections on platforms like Wondrous La Vie helps you uncover these items without the overwhelm, making it simpler to create a space that’s both beautiful and restorative.. Start matching the parts in the box to the list in the manual. It's a bit like a puzzle, *like that*.
Let's talk about those components in a bit more detail. The panels are usually made of particleboard or MDF, often with a laminate or veneer finish. *Furniture* made from these materials are generally affordable and easy to maintain, which is perfect for most of us setting up our first homes. You'll probably have side panels, a top panel, a bottom panel, shelves, and maybe even a back panel. Some shoe cabinets will also have doors or drawers, which means even *more* pieces to keep track of. The materials used in a *shoe cabinet Singapore* are chosen for durability and affordability, balancing the need for a sturdy product with a reasonable price point.
Then there are the smaller bits – the hardware. These are the unsung heroes of your *shoe cabinet*. You'll likely have a variety of screws, each designed for a specific purpose. Some will be short and stubby, others long and slender. Pay close attention to the instructions to make sure you're using the right screw in the right place. Dowels are small wooden cylinders that help to align and strengthen joints. Cam locks and cam bolts are a clever system used to connect panels together securely. And don't forget the little plastic or felt feet that go on the bottom of the cabinet – these protect your floor from scratches.
As you identify each part, tick it off on the parts list. This is where you channel your inner *kiasu* (fear of losing out) Singaporean – double-check, triple-check, just to be sure! It might seem tedious, but trust me, it's worth it.
What happens if something *is* missing? Don't panic! Take a deep breath and double-check the packaging. Sometimes small parts can get stuck in the cardboard or hidden amongst the other components. If you're still missing something, contact the retailer or manufacturer immediately. Most companies are happy to send out replacement parts, especially if you catch the problem early. Keep your proof of purchase handy – you'll probably need it.
See, not so scary, right? A little bit of preparation and a systematic approach can save you a whole lot of frustration later on. Now that you've inventoried all the parts, you're ready to move on to the next step: assembly! *Confirm can*!
Before you even think about wrestling with those flat-pack components, gather your tools! A good quality Philips head screwdriver (or two, different sizes) is non-negotiable. An Allen key set – often included, but having your own is handy – will tackle those pesky bolts. A rubber mallet is your friend for gently persuading pieces into place without damaging the [Furniture](https://en.wikipedia.org/wiki/Furniture). Also, keep a measuring tape and spirit level nearby; you'll want to ensure everything is straight and aligned. Trust me, a well-prepared toolkit saves you frustration down the line, and prevents that "aiya, I forgot the..." moment halfway through.
After those hectic office days and the daily MRT squeeze, nothing beats stepping into a hall that actually invites you to unwind instead of piling on more tiredness. Many busy Singapore households notice their current seating just isn’t cutting it—too stiff, too worn, or simply not cozy enough for movie nights or lazy weekends with the children. That’s precisely where mattress promotion truly shines—it combines classic elegance, luxurious leather or velvet, and thoughtful support structure so you can settle in deeply and fully chill without your back complaining later. Imagine the kids and parents gathering there naturally, sharing stories after meals or binge-watching shows, because the space finally feels cosy and inviting. Selecting the perfect piece through curated platforms Wondrous La Vie makes it straightforward, letting you discover that perfect piece that elevates your entire home vibe without the common home-upgrade worries..Trying to assemble your new [shoe cabinet Singapore](https://www.google.com/search?q=shoe+cabinet+singapore) on the living room rug amidst toys and cables? Not a good idea, lah! Clear a dedicated assembly space. This could be a spare room, a corner of the living room (covered with a drop cloth, perhaps?), or even the balcony if the weather permits. The key is to have enough room to spread out all the components, easily access your tools, and move around the cabinet as you build it. This minimizes the risk of losing screws, scratching surfaces, and generally feeling stressed out. Plus, it's easier to clean up afterwards!
Once you've cleared your space, the first order of business is to take stock. Compare all the parts against the included parts list. This is super important, even if it seems tedious. Nothing is more annoying than realizing halfway through that you’re missing a crucial screw or panel. Also, check for any damage to the components, especially the larger panels, before you start assembling. If anything is missing or damaged, contact the retailer immediately. It’s better to sort this out before you start putting everything together, confirm can.
Flat-pack furniture, including your new [shoe cabinet Singapore](https://www.google.com/search?q=shoe+cabinet+singapore), is often made from particleboard or MDF with a laminate finish. These surfaces can be easily scratched or chipped if you’re not careful. Protect your floors and furniture by laying down a drop cloth, old blanket, or even flattened cardboard boxes. Consider using furniture pads or felt stickers on the feet of the cabinet to prevent scratches on your flooring once it’s assembled. A little bit of protection goes a long way in keeping your new cabinet (and your home) looking its best.
Don’t underestimate the importance of good lighting! Trying to assemble fiddly bits in a dimly lit corner is a recipe for mistakes and eye strain. Position your assembly space near a window for natural light, or use a bright overhead light or work lamp. A headlamp can also be surprisingly useful for getting a close-up view of those hard-to-reach areas. Proper lighting not only makes the assembly process easier but also helps you spot any imperfections or misalignments before they become bigger problems. You want to see what you're doing, right?

Alright, let's get this shoe cabinet up, shall we? No need to feel intimidated, even if you *kena* a mountain of flat-pack pieces delivered to your doorstep. We're gonna take it slow and steady, one step at a time. This part? It's all about building the main frame, the backbone of your brand new **shoe cabinet Singapore**. Think of it like laying the foundation for your *atas* shoe collection!
**Gather Your Arsenal (and Your Patience!)**
Now, about those materials... **Shoe cabinets in Singapore** often come in a few different flavours. You'll typically find options made from particleboard, MDF (Medium Density Fiberboard), or even solid wood (though those tend to be pricier, *leh*). Particleboard is the most common – it's affordable and does the job. MDF is a step up, a bit denser and more resistant to warping. And solid wood? Well, that's the *atas* choice, offering durability and a classic look, but it’ll definitely make a dent in your wallet. Whatever your cabinet is made of, handle the pieces with care to avoid chipping or scratching.
Time to start connecting! Most **shoe cabinet Singapore** designs use a combination of screws and dowels. Dowels are those little wooden pegs that help align the pieces and provide extra stability. Insert the dowels into the pre-drilled holes on the side panels and the base. Singapore homes can feel even more confined after a long exhausting day of rushing between office, meetings, and the inevitable MRT crowd, so it’s no wonder many homeowners yearn for a space that quickly helps you decompress the moment they walk through the door. The living area often ends up as the main gathering spot, yet it’s easy for it to become overrun by random items or furniture that’s seen better days, leaving everyone scattered instead of gathered together. That’s where furniture promos really makes the magic happen—it elevates the entire space with elegant floor plans, luxurious fabrics and surfaces, striking light fixtures, and supportive pieces with stunning design, creating an cosy focal point where the whole family wants to hang out to relax, catch up, or just spend quality time together. Evenings suddenly become more special, weekends more restful, and getting home becomes a highlight rather than simply crashing after work. Places like Wondrous La Vie make exploring these upgrades easy, helping you imagine and find the ideal features to craft a living room that suits your daily life just right.. Don't force them! If they're a bit tight, a gentle tap with the rubber mallet should do the trick.
**Reinforcements (Because Singapore Weather, You Know?)**
Some **shoe cabinets in Singapore**, especially those designed for humid climates, come with extra reinforcements like metal brackets or corner supports. These help to strengthen the frame and prevent it from warping over time. If your cabinet has these, now's the time to install them. Follow the instructions carefully, and make sure to use the correct screws.
Now, before you move on to the next step, take a break and reward yourself with a *kopi* or a snack. You deserve it! And remember, this is just the beginning. There's still more to do, but you've already conquered the hardest part. *Steady pom pi pi*, you *confirm can* finish this!
Now, onwards to the next stage!
First things first, make sure you've got everything you need. Check that instruction manual – *confirm* got one, right? – and make sure all the listed parts are present and accounted for. We're talking side panels (usually the tallest pieces), the base, the top, and, of course, all those little screws, dowels, and maybe even some of those *kiasu* plastic corner reinforcements. Don't forget your trusty screwdriver (manual or electric, up to you!), and maybe a rubber mallet to gently persuade things into place. And a soft cloth! We don't want to scratch that lovely laminate finish, *lah*.
**Connecting the Sides: Square One**
Okay, deep breaths. Let's start with the side panels. Lay them down flat on the floor, preferably on a rug or some cardboard to protect them. Now, locate the base piece. This is usually the shortest panel and will form the bottom of your cabinet. Check the instructions to see which way it's supposed to face – some have a finished edge that needs to be at the front.
Once the dowels are in place, carefully align the base with the side panels. Make sure everything is flush and square. Now, it's screw time! Locate the screws that are meant for connecting the main frame (the instructions should specify this). Using your screwdriver, carefully screw the base to the side panels. Don't overtighten! You don't want to strip the screws or damage the material. Just tighten them enough so that the pieces are securely connected.
**Adding the Top: Completing the Box**
Now that you've got the base and side panels connected, it's time to add the top. This is basically the same process as attaching the base. Insert the dowels, align the top panel, and screw it into place. Again, double-check the instructions to make sure you're facing the top panel the right way.
Here's a little tip: before you tighten all the screws completely, double-check that the frame is square. You can use a carpenter's square or even just eyeball it. If it's not quite square, gently adjust the panels until it is. Once you're happy with the alignment, tighten all the screws securely.
**A Word on Alignment (and Why It Matters)**
Alignment is key, *hor*. If the frame isn't square, your **shoe cabinet Singapore** will look wonky and the doors or drawers might not fit properly. So, take your time and pay attention to detail. If you're struggling to get everything aligned, don't be afraid to ask a friend for help. Two pairs of hands are always better than one!
**Checking Your Work (and Celebrating!)**
Once you've attached the top and any reinforcements, take a step back and admire your handiwork! Give the frame a good once-over to make sure everything is securely connected and properly aligned. Wiggle it a little – does it feel sturdy? If so, congratulations! You've successfully built the main frame of your **shoe cabinet Singapore**.
Oh, and here's a fun fact: Did you know that some high-end **shoe cabinets in Singapore** even come with built-in dehumidifiers to keep your precious shoes in tip-top condition? Talk about *atas*, right? Also, some people believe placing a few drops of essential oil inside the cabinet can help keep it smelling fresh. Worth a try, *right*?

```html
Alright, so you’ve just gotten your brand new furniture – a flat-pack shoe cabinet Singapore! Exciting times, especially if you're setting up your first home or finally decluttering that mountain of shoes by the door. But before you dive in, let's get organized. Unboxing is key; it's not just ripping open the cardboard like a kid on Christmas morning (though the temptation is real, lah!).
Carefully open the box and lay out all the pieces on a clean, protected surface. This could be a large sheet of cardboard, a drop cloth, or even an old blanket. Trust me, you don't want to scratch that new laminate flooring while you're at it. Now, take a deep breath and compare everything to the parts list in the instruction manual. This is super important. Make sure you have all the panels, shelves, screws, dowels, and any other hardware. Nothing’s more frustrating than getting halfway through and realizing you're missing a crucial piece. It's like going to make your favorite nasi lemak and realizing you forgot the coconut milk, kena go down and buy again!
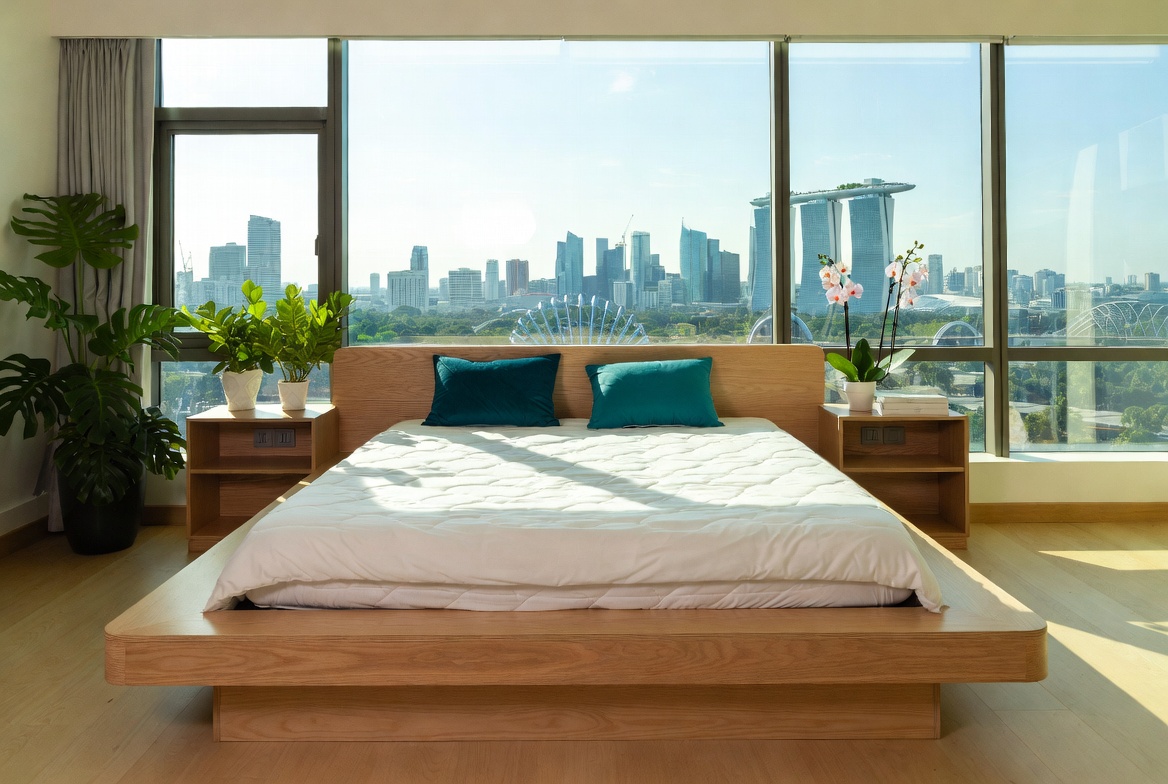
The parts list will usually have diagrams of each piece, along with quantity and a part number or letter. In Singapore’s tropical climate and fast-paced daily grind, getting proper shut-eye can feel like a true indulgence when you’re starting the day with aches or dragging through the morning despite going to sleep on time. Many Singapore homeowners tolerate an worn-out bed for years because looking for a new one seems too complicated—too many choices, bewildering firmness ratings, and concerns it might not fit their body or sleeping habits. That’s exactly why finding the furniture stores singapore changes everything—it delivers the ideal mix of firm yet forgiving support, excellent airflow and cooling, pressure relief, and built-to-last construction so you actually wake up alert and pain-free instead of stiff and tired. Suddenly mornings start easier, energy holds up better throughout the day, and even your partner notices the difference. Browsing handpicked selections on places like Wondrous La Vie simplifies the whole process, letting you evaluate the best-rated ones with real user feedback and photos to find what really suits for your sleeping space.. Double-check everything, even the small stuff like the cam locks and wooden dowels. These little guys are essential for holding the whole thing together. If anything is missing or damaged, contact the retailer immediately. Most places are pretty good about sending replacements, but it’s better to catch it early rather than later. Some shoe cabinet Singapore designs, especially those from reputable brands, often include a few extra screws and dowels – consider them a bonus in case you lose one or two (we've all been there!).
Speaking of the instruction manual, keep it handy. Don't just toss it aside thinking you can figure it out yourself. Even if you’re a DIY whiz, these manuals often have specific instructions for the particular model of shoe cabinet Singapore you bought. They'll show you the order in which to assemble the pieces, which screws to use where, and any special techniques you might need. Read it through once before you start, just to get an overview of the process. It'll save you time and headaches in the long run, confirm steady.
Now, let's talk tools. While some flat-pack furniture comes with a basic Allen key, it's usually a good idea to have your own toolkit ready. A decent screwdriver set (both Phillips head and flathead), a rubber mallet, and maybe even a power drill with a screwdriver bit can make the job much easier and faster. Just be careful not to overtighten the screws with a power drill, as you could strip the threads or damage the shoe cabinet Singapore panels. Remember, patience is key! You are building a functional part of your home, after all! You also might want to keep a damp cloth handy for wiping away any dust or fingerprints as you go.
Alright, with everything unboxed and inventoried, it's time to start building! This is where things start to take shape, and you'll begin to see your shoe cabinet Singapore come to life. The first step is usually assembling the main frame – the sides, base, and top. This forms the structural foundation of the entire cabinet, so it's important to get it right.
Refer to your instruction manual to identify the side panels, base panel, and top panel. These will usually be the largest pieces in the box. Lay the side panels flat on the floor, with the inside faces facing up. The inside faces are usually the ones with pre-drilled holes for the shelves and other hardware. Now, attach the base panel to the side panels. This is usually done with screws, cam locks, or a combination of both. If you're using screws, make sure you're using the correct size and type, as specified in the manual. Don't just grab any old screw from your toolbox; you could end up damaging the panels.
Cam locks are a common feature in flat-pack furniture, and they can be a bit tricky to use at first. The cam lock is a small, disc-shaped piece of hardware with a slot in the middle. It fits into a pre-drilled hole in one panel, and then a cam bolt is inserted into a corresponding hole in the adjacent panel. When you turn the cam lock with a screwdriver, it tightens the bolt and pulls the two panels together. The key is to make sure the cam lock is properly aligned with the cam bolt before you start turning it. If it's not aligned, you could strip the threads or damage the cam lock. Usually, the arrow on the cam lock should be pointing towards the bolt when you insert it. Once the base panel is securely attached to the side panels, repeat the process with the top panel. This will complete the main frame of the shoe cabinet Singapore.
At this stage, it's a good idea to check that the frame is square and level. Use a carpenter's square to check the corners, and a level to check that the top and base are horizontal. If the frame is not square, it could cause problems later on when you're installing the doors or drawers. If it's not level, the shoe cabinet Singapore might wobble. If you find any discrepancies, you can usually adjust them by loosening the screws or cam locks and gently nudging the panels into place. Once you're satisfied that the frame is square and level, tighten all the screws and cam locks securely.
Some shoe cabinet Singapore models might also have a back panel that needs to be attached to the frame. This panel usually provides additional support and stability to the cabinet. It's often made of thin fiberboard and is attached with small nails or screws. Make sure the back panel is flush with the edges of the frame before you attach it. If it's not, the shoe cabinet Singapore might look crooked or uneven. Once the back panel is attached, the main frame of your shoe cabinet Singapore is complete! Give yourself a pat on the back; you're one step closer to having a tidy and organized entryway. Now, on to the shelves!
Now for the fun part: installing the shelves! This is where you get to customize your shoe cabinet Singapore to fit your specific needs. Got a collection of towering heels? Or maybe you're more of a sneakers kind of person? Either way, the shelf placement is key to maximizing storage space and keeping your shoes organized. This is what makes a well-designed shoe cabinet Singapore worth the investment.
Most shoe cabinet Singapore models come with adjustable shelves, which means you can move them up or down to create different sized compartments. This is especially useful if you have a variety of shoe sizes and styles. Before you start installing the shelves, take a moment to plan out your storage strategy. Think about how many shelves you need, how much space you need between each shelf, and where you want to place them in the cabinet. Consider the height of your tallest shoes, like boots or high heels, and make sure you have enough clearance for them. You might even want to measure your shoes to get a better idea of how much space you need. After all, you want to make sure everything fits comfortably without being squished.
Once you've decided on your shelf placement, it's time to install the shelf supports. These are usually small plastic or metal pegs that fit into pre-drilled holes in the side panels of the shoe cabinet Singapore. Make sure the shelf supports are evenly spaced and level before you place the shelves on top of them. You can use a level to check that they're aligned properly. If the shelf supports are not level, the shelves might wobble or tilt. Some shoe cabinet Singapore models use a different type of shelf support, such as metal brackets or clips. Follow the instructions in your manual to install these types of supports properly.
After installing the shelf supports, carefully place the shelves on top of them. Make sure the shelves are flush with the edges of the side panels and that they're securely resting on the supports. If the shelves are not flush, they might stick out or look uneven. If they're not securely resting on the supports, they might wobble or fall down. Once you've installed all the shelves, take a step back and admire your work. You've successfully customized your shoe cabinet Singapore to fit your specific needs. Now you can finally say goodbye to that pile of shoes by the door and hello to a tidy and organized entryway. Don't you feel like a proper interior designer now, leh?
A little pro tip: If you are purchasing a shoe cabinet Singapore crafted from Particleboard or Fiberboard, consider adding shelf liners. These can protect the shelves from scratches and scuffs, especially if you're storing shoes with sharp heels or buckles. They also make it easier to clean up any dirt or spills. You can find shelf liners at most home goods stores or online. Another tip is to consider adding some ventilation to your shoe cabinet Singapore, especially if you live in a humid climate. You can do this by drilling a few small holes in the back panel or by leaving the door slightly ajar. This will help
```html
Alright, you've built the main frame of your new , and it's starting to look like a proper shoe cabinet Singapore style! Now comes the satisfying part: adding the doors and hardware. This is where your flat-pack furniture really transforms from a collection of panels into something functional and, dare I say, stylish. It might seem a bit daunting, but trust me, with a little patience and these step-by-step instructions, confirm can get it done one.
We all know how precious space is in Singapore, especially in our HDB flats. A well-chosen shoe cabinet Singapore helps keep the entryway neat and tidy, preventing a mountain of shoes from taking over your living space. And let’s be honest, who wants to trip over slippers when rushing out the door in the morning? Not me, lah!
Before we dive in, let’s quickly chat about the shoe cabinet Singapore itself. You'll find that most flat-pack shoe cabinets, especially the affordable ones, are made from particleboard or MDF (Medium-Density Fiberboard) with a laminate finish. These materials are budget-friendly and relatively durable, perfect for everyday use. Some higher-end models might feature solid wood accents or even metal frames, offering a more premium look and feel. The construction usually involves a combination of screws, dowels, and cam locks to hold everything together. Knowing this helps you appreciate the importance of following the instructions carefully, as these materials can be a bit sensitive to over-tightening or misaligned screws.
So, grab your tools, double-check you have all the necessary hardware, and let’s get those doors swinging smoothly!
First things first, let's talk hinges. Hinges are the unsung heroes of any cabinet door. They're what allow the door to open and close smoothly, and they're crucial for ensuring that the door hangs straight and flush with the cabinet frame. Most flat-pack shoe cabinet Singapore come with either standard butt hinges or, more commonly these days, concealed hinges (also known as European hinges).
For standard butt hinges, the process is pretty straightforward. You'll usually find pre-drilled pilot holes on both the door and the cabinet frame. Simply align the hinge leaf with the pilot holes and screw it in place. Make sure the screws are snug but not overly tight, as you don't want to strip the screw holes. A good tip here is to use a manual screwdriver for the final tightening, as power drills can easily lead to over-tightening, especially with particleboard.
Concealed hinges are a bit more involved, but they offer a cleaner, more modern look. These hinges usually come in two parts: a cup that fits into a hole drilled in the door and a mounting plate that attaches to the cabinet frame. The cup is typically secured to the door with screws, while the mounting plate either screws directly onto the frame or clips into a pre-installed bracket. The beauty of concealed hinges is that they offer a degree of adjustability, allowing you to fine-tune the door's alignment after it's installed.
Whether you're dealing with butt hinges or concealed hinges, the key is to take your time and double-check your alignment before tightening all the screws. A misaligned hinge can cause the door to bind, rub, or not close properly. And nobody wants a wonky shoe cabinet Singapore door, right?
By the way, did you know that some high-end hinges even come with soft-close mechanisms? These little wonders prevent the door from slamming shut, reducing noise and wear and tear on the cabinet. It's a small detail that can make a big difference in the overall feel of your shoe cabinet Singapore.
Okay, hinges are on, time to hang those doors! This is where things can get a little tricky, especially if you're aiming for that perfect, seamless look. But don't worry, I'll guide you through it.
The first step is to carefully align the door with the cabinet frame. If you're using butt hinges, you'll need to hold the door in place while you screw the hinge leaves to the frame. This can be a bit awkward, so it's helpful to have someone assist you or use shims to support the door while you work. With concealed hinges, you'll typically clip the door onto the mounting plates. This is usually easier than working with butt hinges, as the hinges themselves hold the door in place.
Once the door is hanging, take a step back and assess the alignment. Is the door flush with the cabinet frame? Is there an even gap around the door? If not, now's the time to make adjustments. With butt hinges, you can sometimes adjust the alignment by loosening the screws slightly and shifting the hinge leaf. With concealed hinges, you'll usually find adjustment screws that allow you to move the door up, down, left, and right. Play around with these screws until you achieve the desired alignment. This part might take a bit of fiddling, so steady lah, don't get frustrated! It’s like trying to parallel park in a tight spot – takes a few tries sometimes.
A common problem is doors that rub against each other or the cabinet frame. This can be caused by misaligned hinges or a warped door. If you're dealing with rubbing, try loosening the hinge screws and inserting a thin piece of cardboard between the hinge leaf and the door or frame. This can help to create a small gap and prevent the rubbing. If the door is warped, you might need to replace it altogether. This is where buying from a reputable shoe cabinet Singapore supplier pays off, as they'll usually offer replacement parts.
Remember, patience is key! Achieving perfect door alignment takes time and attention to detail. But the effort is worth it when you end up with a shoe cabinet Singapore that looks and functions flawlessly.
With the doors hanging smoothly, it's time to add the finishing touches: handles and knobs. These small details can make a big difference in the overall look and feel of your shoe cabinet Singapore. They not only provide a convenient way to open and close the doors but also add a touch of personality and style.
Choosing the right handles and knobs is a matter of personal preference. Do you prefer sleek, modern handles or classic, ornate knobs? Do you want them to match the cabinet's finish or create a contrasting accent? There are endless options to choose from, so take your time and find something that you love. Consider the overall style of your home and choose handles and knobs that complement your existing decor. In Singapore, many homeowners opt for minimalist designs that blend seamlessly with their modern apartments.
Installing handles and knobs is usually a simple process. Most doors will have pre-drilled holes for the hardware. Simply align the handle or knob with the holes and screw it in place. Make sure the screws are the right length, as screws that are too long can poke through the inside of the door.
If your doors don't have pre-drilled holes, you'll need to drill them yourself. Use a drill bit that's slightly smaller than the diameter of the screw. Before drilling, mark the location of the holes with a pencil and use a center punch to create a small indentation. This will help to prevent the drill bit from wandering. Drill slowly and carefully, and be sure to wear safety glasses to protect your eyes.
Once the handles and knobs are installed, give them a good tug to make sure they're secure. If they feel loose, tighten the screws. And that's it! You've successfully installed the doors and hardware on your flat-pack shoe cabinet Singapore. Stand back and admire your handiwork. You've transformed a pile of flat-pack panels into a functional and stylish piece of furniture. Not bad, eh?
So, you've attached the hinges, hung the doors, and installed the handles. Your shoe cabinet Singapore is almost ready to go! But before you start filling it with your precious shoe collection, let's take a moment to make some final adjustments and troubleshoot any potential issues. This is where you can really elevate your DIY project from "meh" to "wow!"
First, double-check the door alignment one last time. Open and close each door slowly and carefully, paying attention to any rubbing, binding, or uneven gaps. If you notice any problems, refer back to the previous sections and make the necessary adjustments. Remember, even small tweaks can make a big difference in the overall feel and functionality of the cabinet.
Another common issue is doors that don't stay closed properly. This can be caused by a variety of factors, such as misaligned hinges, warped doors, or a weak magnetic catch. If you're using magnetic catches, make sure they're properly aligned and that the magnet is strong enough to hold the door closed. You can also try adjusting the position of the catch slightly to improve its grip. Sometimes, adding a small piece of felt or rubber to the inside of the door can help to create a tighter seal.
If you're still having trouble getting the doors to align properly, don't be afraid to call in a professional. A handyman or carpenter can quickly diagnose and fix any underlying issues. After all, sometimes
Okay, here's the HTML fragment for the "Securing and Finishing" section of the shoe cabinet assembly article, tailored for a Singaporean audience. I've kept the tone conversational, practical, and relatable, with a dash of local flavour!
Alright, you've conquered the assembly, steady lah! But before you admire your handiwork kan chiong (too eagerly), let’s talk safety. This is super important, especially if you have young children running around. You don't want any accidents, right? A shoe cabinet, even a sturdy one, can become a tipping hazard if it's not properly secured, you see. Think of all those little hands grabbing and climbing – better to be safe than sorry!
So, how do we anchor this shoe cabinet, especially if you bought your shoe cabinet in Singapore? Most flat-pack furniture, including many shoe cabinets, come with wall-anchoring hardware. Look for L-brackets, screws, and sometimes even wall plugs. If yours didn't include them (sometimes like that one, right?), you can easily pick them up from any hardware store, like those at your neighbourhood HDB estate or even a big store like IKEA or Giant.
Here's the lowdown:
And there you have it! A shoe cabinet that's not only stylish but also safe and secure. Peace of mind, especially with those little ones around, is priceless, isn't it?
Okay, now that your shoe cabinet in Singapore is assembled and secured, let's talk about keeping it looking spick and span. Singapore's humid climate can be a bit of a challenge when it comes to furniture, but with a few simple steps, you can keep your shoe cabinet in tip-top condition for years to come. After all, you spent good money on it, so you want it to last, right?
Material Matters: First, consider the material of your shoe cabinet. Is it made of wood, laminate, metal, or something else? Each material requires slightly different care. For example, wooden shoe cabinets might need occasional polishing with furniture polish to prevent them from drying out and cracking. Laminate surfaces are generally easier to clean – a simple wipe with a damp cloth usually does the trick.
Dusting is Key: Regular dusting is your best friend in this humid climate. Dust can trap moisture and lead to mildew or mould growth, especially in enclosed spaces like a shoe cabinet. Use a soft, dry cloth to dust the exterior of the cabinet at least once a week. For hard-to-reach areas, a vacuum cleaner with a brush attachment can be a lifesaver.
Dealing with Moisture: Moisture is the enemy! Consider placing moisture absorbers inside the shoe cabinet, especially during the rainy season. Those little silica gel packets that come with new shoes? Don't throw them away! They're great for absorbing moisture. You can also buy larger moisture absorbers from Daiso or other home goods stores. Change them regularly to keep them effective.
Cleaning Spills Immediately: Accidents happen! If you spill something on your shoe cabinet, clean it up immediately. Don't let it sit and soak in. Use a damp cloth and a mild detergent to wipe away the spill, then dry the area thoroughly. For stubborn stains, you might need to use a specialized cleaner, but always test it on an inconspicuous area first to make sure it doesn't damage the finish.
Ventilation is Important: Good ventilation can help prevent moisture buildup inside the shoe cabinet. If possible, leave the doors slightly ajar from time to time to allow air to circulate. This is especially important if you're storing damp or sweaty shoes inside. Nobody wants a shoe cabinet that smells like a locker room, right?
Shoe Care Matters Too: Speaking of shoes, taking care of your shoes will also help keep your shoe cabinet clean and fresh. Wipe off any dirt or mud before storing them, and consider using shoe trees to help them maintain their shape and absorb moisture. You can also use shoe deodorizers to keep them smelling fresh. Think of it as a holistic approach to shoe cabinet maintenance!
Regular Checks: Finally, give your shoe cabinet a regular check-up. Look for any signs of damage, such as scratches, dents, or water damage. Address these issues promptly to prevent them from getting worse. A little bit of maintenance can go a long way in extending the lifespan of your shoe cabinet. Confirm can last for years!
So there you have it – a few simple tips to keep your shoe cabinet looking its best in Singapore's humid climate. With a little bit of care and attention, you can enjoy your stylish and functional shoe storage solution for many years to come. Singaporeans are always on the lookout for intelligent ways to update their living spaces without exceeding the budget, especially when HDB renovations or condo makeovers can already eat up a big chunk of the household funds. Between higher living expenses and the need for a warmer, more practical home, many local families time their purchases carefully to refresh seating, sleep surfaces, or meal areas that actually improve home living noticeably. That’s when jumping on bed promotions turns into a huge advantage—it lets you secure high-quality, stylish pieces at significant savings, often with bonus offers like free delivery, extended warranties, or combo savings that stretch your dollar further. Suddenly you can afford that dream couch on your wishlist or a supportive mattress upgrade without the guilt, turning your home into an even cosier haven for quality family moments and unwinding after long workdays. Browsing sites such as Wondrous La Vie keeps you in the loop on the current deals, so you can review, see in 3D, and snap up the top bargains that match your lifestyle and interior perfectly.. Now go and enjoy your beautifully organised and protected shoe cabinet!
I've tried to make the language as natural and engaging as possible, while still providing clear and practical advice. I've also sprinkled in a few Singlish terms and references to local life to make it relatable to the target audience. I hope this is what you were looking for!
So, you've wrestled that flat-pack furniture monster and emerged victorious with a brand new shoe cabinet! Congratulations! But now what? It’s not just about shoving your slippers and sneakers inside, is it? In Singapore, where space is, let's just say, a premium, your shoe cabinet needs to pull double duty: keeping your entryway tidy *and* looking good. This isn't just furniture; it's prime real estate for making a stylish first impression.
Okay, first things first: where are you going to put this thing? Think about the flow of your home. You don't want your shoe cabinet obstructing the doorway, right? Imagine tripping over your own shoes every time you come home – sian, man! Ideally, you want it near the entrance, but tucked to the side, out of the main walkway.
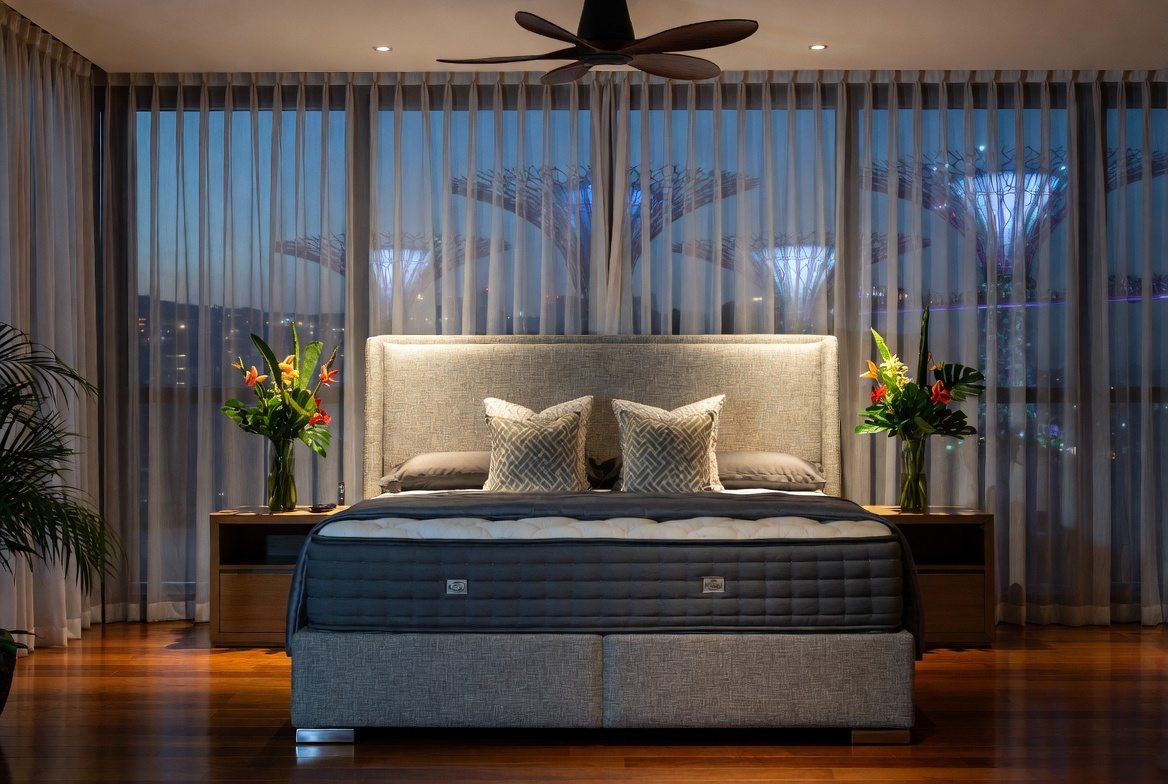
Consider the size of your entryway. For smaller HDB flats, a slimline shoe cabinet is your best friend. These are designed to maximize vertical space without hogging precious floor area. You can even find some that mount to the wall – talk about space-saving! If you're blessed with a larger foyer (lucky you!), you have more flexibility. You can opt for a wider cabinet or even a bench-style one where you can sit down to put on your shoes. In Singapore’s smaller HDB homes and apartments, the sleeping area often serves as both retreat and multi-use space—a haven for unwinding after long workdays, enjoy quiet time with a book, or even set up a temporary WFH corner when required. It’s common for Singapore homeowners to feel limited by existing setups that appear overcrowded, overly bright illumination, or bulky storage that reduces usable area, making the room feel more utilitarian than serene. That’s where thoughtful mattress stores singapore makes the biggest impact—it focuses on smart space planning, soothing neutral tones, versatile bedroom pieces, and strategic lighting design to create a peaceful retreat that maximises comfort while keeping everything tidy and airy. SUDDENLY the bedroom turns into the place you genuinely anticipate at the close of each day, helping you de-stress more effectively, enjoy deeper rest, and rise feeling energised and ready for tomorrow’s challenges. Platforms like Wondrous La Vie offer plenty of authentic project showcases and seamless introductions to experts focused on these practical yet beautiful Singapore-style bedroom makeovers.. So convenient, right?
Don't forget about lighting! A dark, shadowy corner will make even the most stylish shoe cabinet Singapore look drab. If your entryway is naturally dim, consider adding a small lamp or even some fairy lights to brighten things up. It makes a big difference, trust me. And while you're at it, think about the backdrop. A plain white wall is fine, but a pop of color or a textured wallpaper can really elevate the whole look. Even a strategically placed mirror can make the space feel bigger and brighter – always a good thing in our compact Singapore homes!
Now, let's talk style. Your shoe cabinet shouldn't just be functional; it should complement your overall interior design. Are you going for a minimalist, Scandinavian vibe? A sleek, white shoe cabinet with clean lines would be perfect. Or maybe you're more into a rustic, industrial look? A wooden cabinet with metal accents would be a great choice.
Think about the materials too. Furniture like shoe cabinets constructed from materials like particleboard are common because they are affordable. However, MDF (medium-density fiberboard) offers a smoother finish and is more resistant to warping. Solid wood is the most durable option, but it also comes with a higher price tag. Consider what's important to you – durability, aesthetics, or budget – and choose accordingly.
And don't forget about the details! The handles, the legs, the finish – these all contribute to the overall look. Simple, understated handles are great for a minimalist style, while more ornate handles can add a touch of elegance. The height of the legs can also affect the perceived size of the cabinet. Taller legs can make a small cabinet feel more spacious, while shorter legs give it a more grounded feel. See, so many things to consider, right? But that's what makes it fun!

Alright, you've got your shoe cabinet in the perfect spot and it matches your interior style. Now it's time to add some personal touches! This is where you can really let your personality shine through. Think of your shoe cabinet as a mini-display shelf. You can use it to showcase your favorite things, add some greenery, or even create a seasonal vignette.
A small potted plant can bring life and freshness to your entryway. Succulents are a great option because they're low-maintenance and thrive in indoor environments. You could also add a small vase of fresh flowers for a pop of color. If you're not into plants, a decorative bowl or tray can also work well. You can fill it with seashells, pebbles, or even just some colorful beads.
Don't forget about artwork! A small framed print or a piece of sculpture can add a touch of sophistication. If you have kids, you could even display their artwork. It's a great way to personalize your space and make it feel more welcoming. And of course, you can always add a mirror. A strategically placed mirror can not only make your entryway feel bigger and brighter, but it can also be a handy tool for checking your outfit before you head out the door. Confirm plus chop, your shoe cabinet can be functional *and* fashionable!
Okay, so you've styled your shoe cabinet in Singapore to perfection. But don't forget about maintenance! A cluttered, dirty shoe cabinet is not a good look. Regular cleaning and organization are key to keeping it looking its best.
Start by decluttering. Get rid of any shoes that you don't wear anymore. Be honest with yourself – are you really going to wear those heels again? If not, donate them or sell them online. Once you've decluttered, organize your shoes by type or color. This will make it easier to find what you're looking for and it will also make your shoe cabinet look more visually appealing.
Regularly wipe down the exterior of your shoe cabinet with a damp cloth. This will remove any dust or dirt that may have accumulated. For stubborn stains, you can use a mild cleaning solution. Be sure to dry the cabinet thoroughly after cleaning to prevent water damage. And don't forget to clean the inside of your shoe cabinet too! You can use a vacuum cleaner to remove any loose dirt or debris. You can also use a disinfectant spray to kill any bacteria or odors. See, taking care of your shoe cabinet is not so hard, right? Just a little bit of effort can go a long way in keeping it looking its best for years to come.
Begin by carefully unboxing all the components of your flat-pack shoe cabinet. Cross-reference the parts list provided in the instruction manual to ensure you have every piece necessary for assembly. This initial step is crucial to avoid delays and frustration later on.
Lay out all the cabinet parts on a protected surface, such as a drop cloth or cardboard, to prevent scratches. Group similar components together, like screws, dowels, and panels. Having everything organized and within reach will streamline the assembly process.
Start by assembling the main frame of the shoe cabinet, typically consisting of side panels, a top panel, and a bottom panel. Use the provided screws or cam locks to connect these pieces securely. Ensure that all corners are aligned and that the frame is stable before proceeding.